Free shipping for order over $50

Free shipping for order over $50
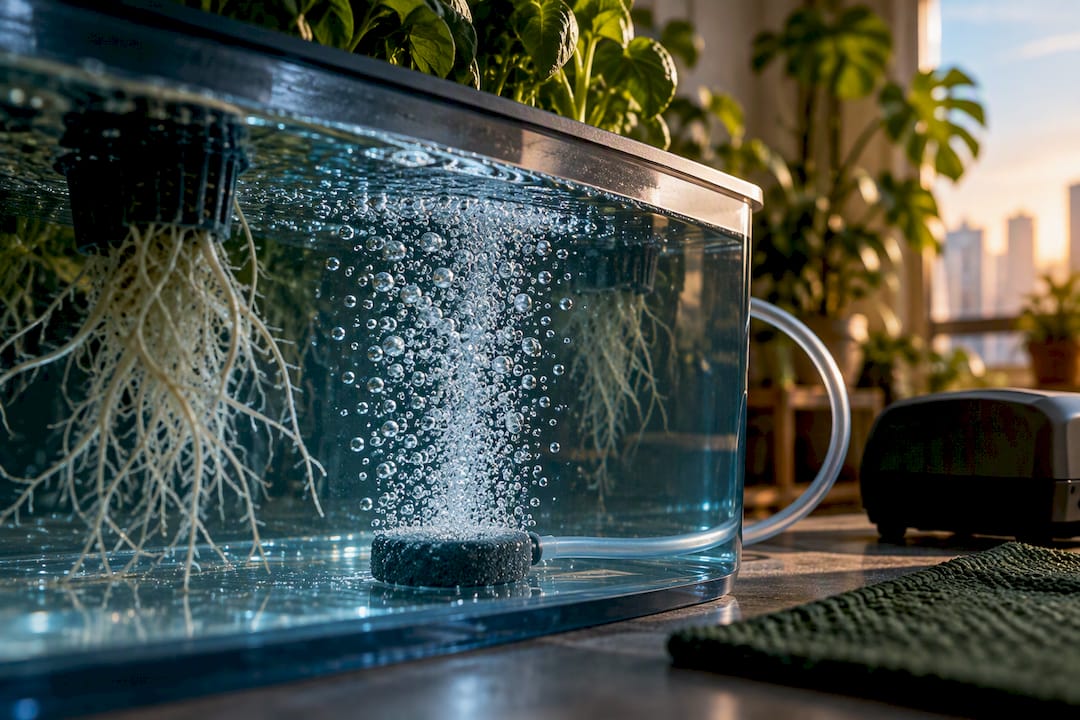
Base the math on actual liquid volume, not container capacity, and confirm results with a dissolved oxygen probe or plant response rather than trusting the pump’s box rating alone. Warm water changes the equation fast, so temperature limits matter as much as the pump you pick.
TL;DR:
- For a single 5-gallon bucket, an air pump should deliver about 5 liters per minute, with additional headroom for tubing and resistance.
- System types like Kratky or NFT require less aeration, often not needing continuous pumping, while Ebb-and-flow still benefits from reservoir aeration.
- Higher temperatures above 78°F significantly reduce dissolved oxygen, making cooling systems like chillers more effective than larger pumps.
- Real-world back-pressure from tubing and stones often drops airflow capacity by 20 to 30 percent, so overspec by around 25 percent for reliable performance.
- Using modular reservoirs with fixed volumes simplifies pump sizing and reduces trial-and-error, improving plant health and system reliability.
Start by measuring the working solution, the water that actually fills your bucket or reservoir, not the container’s listed capacity. A 5-gallon bucket filled to 4 gallons needs airflow sized for 4 gallons, not 5.
OSU Extension recommends about 1 LPM of air per US gallon of working nutrient solution for deep water culture, which converts to roughly 0.26 LPM per liter. A lower-demand floor of about 0.13 LPM per liter shows up in some sizing calculators for smaller or less crowded setups, though it leaves little margin if temperatures climb.
The full calculation runs in a fixed order:
A single 5-gallon DWC bucket needs about 5 LPM as a baseline, following OSU Extension’s recommendation. Adding typical headroom for back-pressure leads to a slightly higher airflow requirement, which small single-outlet pumps rated above this value generally meet.
A 4-bucket RDWC setup with 20 liters of working solution per bucket totals 80 liters. At 0.26 LPM per liter, that comes to a recommended airflow figure before headroom. A worked example from a hydroponic air pump calculator confirms this approach for an 80-liter system and suggests a pump sized to cover typical real-world conditions with multiple outlets, splitting flow evenly across buckets. That split matters: a single large stone in one bucket and four small ones in the others will starve some buckets even if total pump output looks correct on paper.

Keep the working volume figure written down somewhere near your reservoir. Refilling or topping off changes it, and the calculation is only accurate if the actual volume is known.
A DWC calculation applied to a Kratky system or an NFT channel will badly oversize or undersize the pump you actually need, because roots interact with oxygen differently across system types.
Reservoir aeration still helps NFT and ebb-and-flow systems even when it is not the primary oxygen source, because a stagnant reservoir can develop anaerobic pockets and root pathogens over time. A modest air stone in the reservoir, sized well below the DWC baseline, is common practice in those systems even though it is not the main line of defense against low oxygen. Readers weighing which setup fits their space can compare automated hydroponic setup types before committing to a pump purchase, since the system choice determines the sizing rule that applies.
Water holds less dissolved oxygen as it warms, a straightforward consequence of Henry’s Law, and no amount of extra airflow pushes DO above the ceiling that temperature sets. This is the single most common reason a correctly sized pump still seems to underperform.
Sizing guides commonly apply a 1.25× multiplier above 72°F and a 1.5× multiplier above 78°F to compensate for reduced oxygen solubility, since more bubbles moving through warm water only partially offsets the lower saturation point. Ideal DWC reservoir temperatures sit around 62 to 68°F. Above 72°F, treat aeration as a compensating measure rather than a fix. Above 78 to 82°F, root stress and disease pressure climb regardless of how much air you push through the water, and pump upsizing stops paying off.
Calculators that build in a temperature step are doing more than padding the number, they are acknowledging that airflow and oxygen saturation are two different things. A 30-liter reservoir sitting at 80°F will not reach the same DO level as the same reservoir at 65°F, no matter which pump feeds it.
When reservoir temperature runs consistently above 72°F, a chiller sized to your reservoir volume is usually a better investment than a bigger pump, since it addresses the ceiling directly instead of chasing it. Pair that decision with a dissolved oxygen meter if you can, since plant stress symptoms alone can lag behind an actual oxygen problem by days.
Pump manufacturers rate output at zero back-pressure, meaning the number on the box assumes no tubing, no check valve, and no diffuser resistance pushing back against the air. Real setups have all three.
Pro Tip: Run your pump with the exact tubing, check valves, and stones you intend to use before finalizing your bucket count, since a setup that looks fine on a bench can fall short once real back-pressure is added.
Wattage for common home setups tends to run from single-digit watts for a small single-bucket pump up to 20 to 40 watts for a multi-outlet pump feeding an RDWC system with several buckets. That range gives a rough sense of what to expect on an electricity bill, though actual draw depends on the specific pump model and how hard it is working against back-pressure.

Total pump LPM only matters if it reaches each bucket in the right amount, which means matching stone type and count to the flow you calculated.
| Stone type | Typical LPM range | Best fit |
|---|---|---|
| Cylinder (small) | 1 to 2 LPM | Single small bucket or low-flow branch |
| Cylinder (4 inch) | 2 to 4 LPM | Mid-size single bucket |
| Disc (4 inch) | 4 to 8 LPM | Standard DWC bucket |
| Disc (8 inch) | 8 to 10 LPM | Larger bucket or higher-demand crop |
Data from a hydroponic air pump calculator worked example.
Divide your total required LPM by the number of buckets or stones you plan to run, then pick a stone whose rated range covers that per-bucket figure with some margin. The 80-liter, four-bucket example above needing roughly 5.3 LPM per bucket points toward a 4-inch disc stone rather than a small cylinder stone, which would run near its ceiling constantly.
Air stones clog gradually as mineral deposits and biofilm build up in the pores, and a clogged stone delivers noticeably less LPM than its rating even though the pump upstream is working normally. Soaking stones in a dilute vinegar solution every few weeks and replacing them every few months in hard water conditions keeps delivered airflow close to the rated figure. A stream of large, uneven bubbles instead of a fine, even mist is usually the first visible sign a stone needs cleaning or replacing.
A dissolved oxygen probe is the most direct way to confirm your pump and stone combination is actually working, since airflow specs on paper do not guarantee oxygen in the water. Target ranges commonly cited for hydroponic reservoirs sit around 5 to 8 mg/L, though needs vary by crop and growth stage, so treat that range as a starting point rather than a fixed rule.
When oxygenation seems inadequate, work through the checklist in order rather than jumping straight to a bigger pump:
Pro Tip: Change one variable at a time and log the result for a few days before making another adjustment, since aeration problems often have more than one cause and simultaneous changes make it hard to tell which fix actually worked.
If yellowing leaves point to iron trouble rather than low oxygen, dialing back agitation slightly, while keeping DO in range, is often the better move over adding more airflow. Peer-reviewed aeration research backs this up directly: growth improved as aeration increased from a low starting point, plateaued, and then declined at the highest intensities tested, which rules out the assumption that more bubbles are always better.
Sizing an air pump gets easier when the reservoir volume is fixed and known, which is exactly what a modular system provides. Some hydroponic setups feature a compact modular footprint with a defined, repeatable working volume per reservoir module, rather than buckets filled to varying levels.
That consistency removes the biggest source of sizing error described above, guessing at working volume, and makes matching a pump and stone configuration to the hydroponic systems a matter of straightforward math rather than trial and error. Users of these hydroponic products have reported rapid seed germination and improved plant health, with customer satisfaction reflected in high product ratings from numerous orders. For readers who want the calculation done once and repeated reliably across modules rather than recalculated for every new container, that predictability is the practical advantage.
Air pumps run continuously, so the hum they produce is a permanent feature of whatever room they sit in, not an occasional annoyance. Diaphragm pumps tend to run quieter than piston pumps at comparable output, which matters if the reservoir sits in a bedroom, living room, or shared apartment space.
Placement affects both noise and pump lifespan. Setting a pump directly on a hard floor or shelf transmits vibration into the surface, amplifying the hum, while a foam pad or rubber mat underneath the pump absorbs much of that vibration and noticeably cuts perceived noise. Elevating the pump above the reservoir’s water line is a separate and non-negotiable placement rule: it prevents siphoning if the pump loses power, which would otherwise pull reservoir water back through the tubing.
Ventilation matters too. Pumps generate a small amount of heat during continuous operation, and tucking one into a closed cabinet with no airflow shortens its working life and can nudge nearby reservoir temperature upward, working against the temperature limits covered earlier. A well-ventilated spot near, but not touching, the reservoir tends to balance noise, heat, and siphon safety better than cramming the pump into the tightest available space.
Pump maintenance scales with size and duty cycle more than with brand or price. A small single-outlet pump running one bucket needs little beyond an occasional wipe-down and a check that the diaphragm or piston still sounds smooth rather than strained.
A multi-outlet pump feeding several buckets in an RDWC setup works harder and benefits from a periodic inspection of its internal filter, when one exists, along with a check that each outlet is still delivering airflow evenly. An uneven hiss across outlets usually points to a partial blockage rather than pump wear.
Tubing and check valves need their own maintenance schedule separate from the pump itself. Check valves prevent water from siphoning back into the pump during a power interruption, and a stuck or failed valve is a common, quiet cause of reduced airflow that gets mistaken for pump failure. Replacing tubing that has become brittle or cracked, typically every year or two depending on sunlight exposure and material, keeps delivered LPM close to what the pump is actually producing.
Stones, covered earlier, are the maintenance item most likely to silently erode performance, since a clogging stone reduces delivered airflow gradually enough that the change is easy to miss until plant stress shows up.
Pump wattage scales roughly with output and outlet count, which means energy cost is one more reason to size accurately rather than reflexively buying the largest pump available. A small single-outlet pump for one bucket typically draws in the single digits of watts, a modest, continuous draw that adds up over a growing season but rarely dominates a household electricity bill.
Multi-outlet pumps feeding several buckets in an RDWC system commonly draw in the 20 to 40 watt range, and running continuously for weeks or months makes that difference add up faster than a quick glance at the spec sheet suggests.
Running a pump at the size the calculation actually calls for, rather than the biggest one on the shelf, keeps energy draw proportional to the oxygen your plants can actually use.
The instinct to buy the biggest pump available is understandable, but the math and the research both point the other way. Monitoring, conservative overspec, and temperature control solve more oxygenation problems than a bigger pump ever will, and they cost less to run over a season.
The real trade-off growers face is not pump size alone, it is energy draw against dissolved oxygen against agitation stress on sensitive crops. Getting that balance right takes a DO meter and a willingness to adjust one variable at a time, not a bigger box. Readers who want a simpler starting point can look at Sprout Lab’s DIY hydroponic setups for a lower-friction entry into the same calculations.
— Irwin Lee
Getting pump sizing right depends on knowing your exact working volume, and that is precisely what a modular system fixes from the start. Sprout Lab’s hydroponic setups give each reservoir a fixed, known volume, so the calculation in this guide only needs to be done once per module instead of re-measured every time you refill a bucket.

Browse Sprout Lab’s hydroponic systems to see the modular setups built around this kind of predictable sizing.
For DWC, size your pump to roughly 1 LPM per US gallon of working solution, based on OSU Extension guidance, then add about 25% headroom to cover tubing and stone resistance. A 5-gallon bucket needs about 5 LPM as a baseline, with slightly more including headroom.
The right size depends on your system type and working solution volume, not the container’s maximum capacity. Multiply your actual liquid volume by the baseline rate from a hydroponic air pump calculator, adjust for reservoir temperature, then add roughly 25% for real-world losses.
There is no single best pump size, since the right choice depends on your reservoir volume, system type, and tubing setup. A piston pump tends to hold up better for continuous multi-bucket RDWC use, while a smaller diaphragm pump is often enough, and quieter, for a single DWC bucket.
Measure your actual working solution volume, apply the baseline LPM rate for your system type, and add a temperature adjustment if your reservoir runs warm. Add roughly 25% headroom to that final figure, then confirm the result with a dissolved oxygen probe once the system is running.