Free shipping for order over $50

Free shipping for order over $50
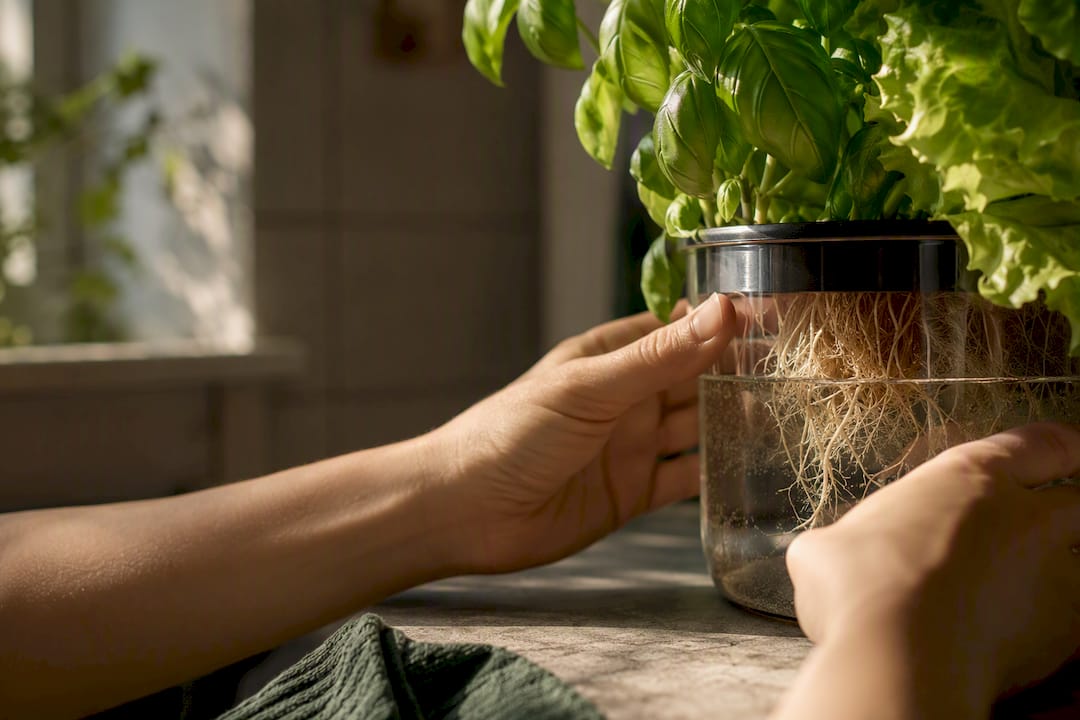
For most apartments, the best starting point is a passive Kratky mason-jar setup or a single countertop DWC unit, depending on how much noise and power you’re willing to deal with. Keep your nutrient solution between pH 5.5 and 6.5 with an EC around 1.5 to 2.5 mS/cm, and always set your system on a tray or mat to catch drips. If you want a tested, supported kit instead of piecing one together yourself, Modular systems exist that are designed exactly for this kind of small-space start.
TL;DR:
- Kratky jars are completely passive, require no electricity, and are ideal for small window ledges or shelves under 12 inches deep.
- Countertop DWC systems need a nearby outlet and a stable surface, but are widely considered the easiest active hydroponic system for beginners.
- Starting with one to two small systems for three to four weeks helps build confidence and avoids burnout from scaling too quickly.
- Monitoring pH between 5.5 and 6.5 and replacing nutrient solution every 2 to 3 weeks are key to maintaining healthy plants and preventing mineral buildup.
- Using opaque containers or wrapping reservoirs with foil prevents algae, while placing reservoirs on trays minimizes water damage from spills.
You don’t need a spare room to growing food hydroponically. The trick is matching the system to your space, your patience for maintenance, and how much noise you can live with next to your couch.
Kratky fits window ledges and shelves under 12 inches deep. DWC tubs need a stable countertop spot near an outlet. Vertical towers reward height over floor space, which matters most in a studio.
Before you buy anything, walk your apartment with a tape measure and a notepad. The system that looks great online can be a nightmare if it doesn’t match your actual constraints.
Pro Tip: Put a rubber shelf liner or a boot tray under every system, even the passive ones. Condensation and small splashes happen more often than you’d expect, and a $10 tray beats explaining a water stain to your landlord.
Renters get more mileage out of tension rods, over-door racks, and freestanding wire shelving than anything that touches drywall. A well-placed compact system built for tight footprints can slot into a kitchen corner without any permanent changes at all.
Jumping straight to a five-tier tower is how most beginners burn out in month two. A phased start keeps costs low and your learning curve manageable.
Weekly checklist: top up water or nutrient solution as levels drop, glance at roots and leaves for discoloration, and wipe down any algae film on the outside of jars or reservoirs. That’s the entire routine most weeks.
A south or west-facing window with several hours of direct sun can carry herbs and lettuce without any grow light. Anything dimmer, and you’ll want a full-spectrum LED running 12 to 16 hours a day, positioned 6 to 12 inches above the leaves.
Nutrient chemistry is where most beginners get nervous, and it shouldn’t be that complicated.
Small LED units typically add only a few dollars a month to your electricity bill, which is a fraction of what most people assume.
Algae, noise, and spills are the three complaints that come up again and again, and all three have simple fixes.
Pro Tip: If your pump still hums louder than you’d like, wedge it inside a small cardboard box lined with felt. It muffles sound without blocking airflow to the intake.
A hydroponic setup doesn’t have to look like a science experiment on your kitchen counter. A little styling goes a long way toward making it feel like furniture instead of equipment.
Not every plant is a good match for your first few months of hydroponic growing. Fast, forgiving, compact plants build your confidence before you try anything finicky.
Herbs are the easiest entry point. Basil, mint, chives, and cilantro root quickly in a Kratky jar and tolerate minor pH swings better than most vegetables. Basil in particular grows fast enough that you’ll see results within two to three weeks, which matters when you’re still learning to read your system.
Leafy greens come next. Lettuce varieties like Buttercrunch, Black Seeded Simmons, and loose-leaf types thrive in both Kratky and DWC setups, usually reaching harvest size in four to six weeks. Spinach and Swiss chard work too, though they’re a bit slower and prefer cooler apartment temperatures.
Microgreens are the fastest payoff of all. Radish, broccoli, and pea shoots germinate in days and are ready to snip within one to two weeks, no pH meter required for most short microgreen cycles since they grow largely on their seed reserves. They’re a good confidence-builder while your first lettuce or herb jar is still working through its slower cycle.
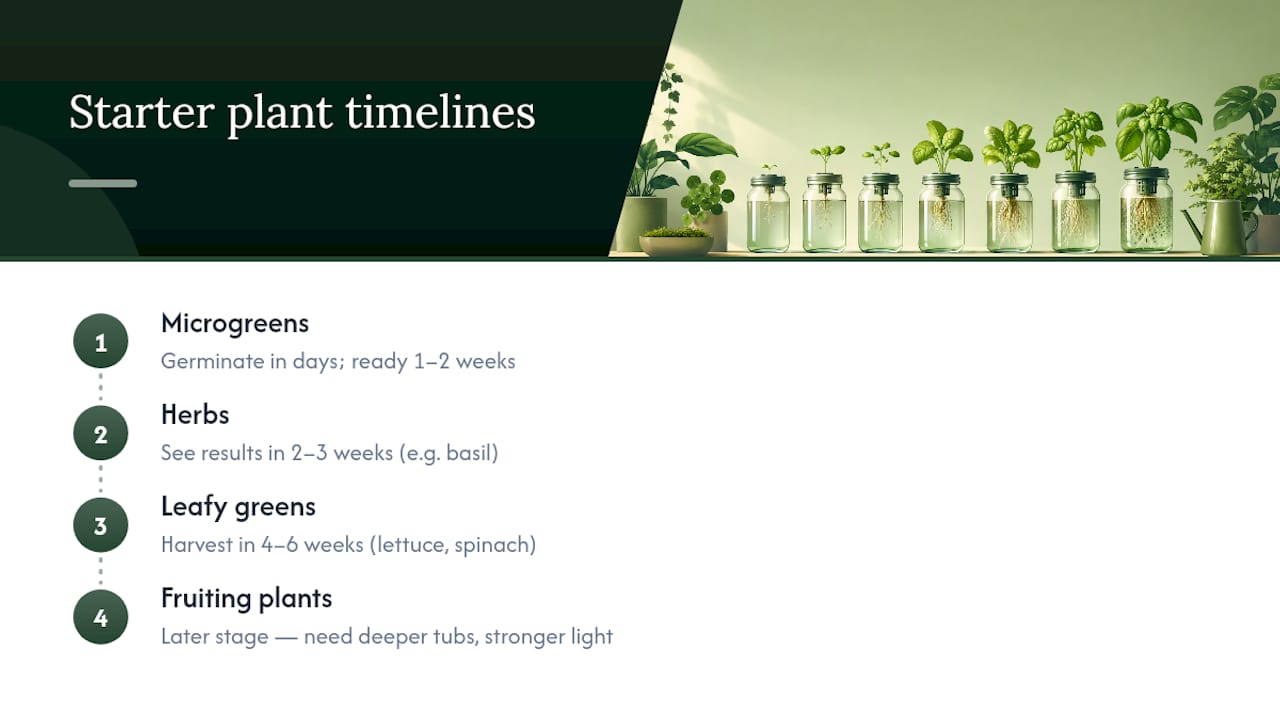
Skip fruiting plants like tomatoes and peppers until you’ve run at least one or two full cycles. They need deeper reservoirs, stronger lighting, and more nutrient volume than a starter setup typically provides. Save those for once you’ve added a dedicated grow light and a larger tub.
Light and airflow decide which plants will thrive and which will sulk, and most apartments have more of both to work with than people assume. Start by tracking how many hours of direct sun a spot actually gets, not how bright it looks to your eye at a glance.
A window that gets four or more hours of direct sun can support lettuce, basil, and most leafy greens without supplemental light. Anything dimmer, especially north-facing windows or interior rooms, needs a full-spectrum LED to hit the light intensity leafy greens require to grow densely instead of leggy.
Airflow matters more than most beginners expect. Stagnant air around dense foliage invites mold and slows transpiration, which can stress roots even when your water chemistry is perfect. A small desk fan on low, run a few hours a day, keeps air moving without drying out the growing medium. Apartments with central air conditioning already get some benefit here, since climate-controlled indoor spaces reduce the pest and mold pressure that outdoor gardens deal with constantly.
If your space runs low on both light and airflow, herbs like mint and chives tolerate the compromise better than lettuce, which tends to bolt or yellow under weak light. Match your ambition to your actual window, not your ideal one.
Getting started costs less than most people expect. A single Kratky jar setup or a basic countertop DWC unit can run somewhere between $25 and $100 for your first unit, depending on whether you build it yourself or buy a packaged kit.
Ongoing costs break into three categories. Nutrient concentrate is the smallest line item, often lasting months per bottle for a one or two-jar setup. Electricity is next, and it’s modest: a small LED grow light typically adds only a few dollars a month to your bill. The air pump in a DWC system draws so little power it’s barely worth calculating separately.
Replacement costs are the one people forget. Net cups, growing medium, and occasional tubing wear out or get swapped between crops, adding a small but steady expense over a year. None of these costs scale dramatically until you add multiple systems or a dedicated vertical tower with several grow lights running at once, at which point your electricity line becomes the biggest recurring number on the list.
Compared to a soil garden’s bags of potting mix, fertilizer, and pest control products, a small hydroponic setup often comes out cheaper per harvest once you account for how much faster leafy greens grow without soil-borne setbacks.
Indoor hydroponic gardens dodge most of the pest pressure outdoor gardens deal with, but they’re not immune. Fungus gnats and aphids can still hitch a ride in on new seedlings or open windows, and root rot shows up when oxygen levels in the reservoir drop.
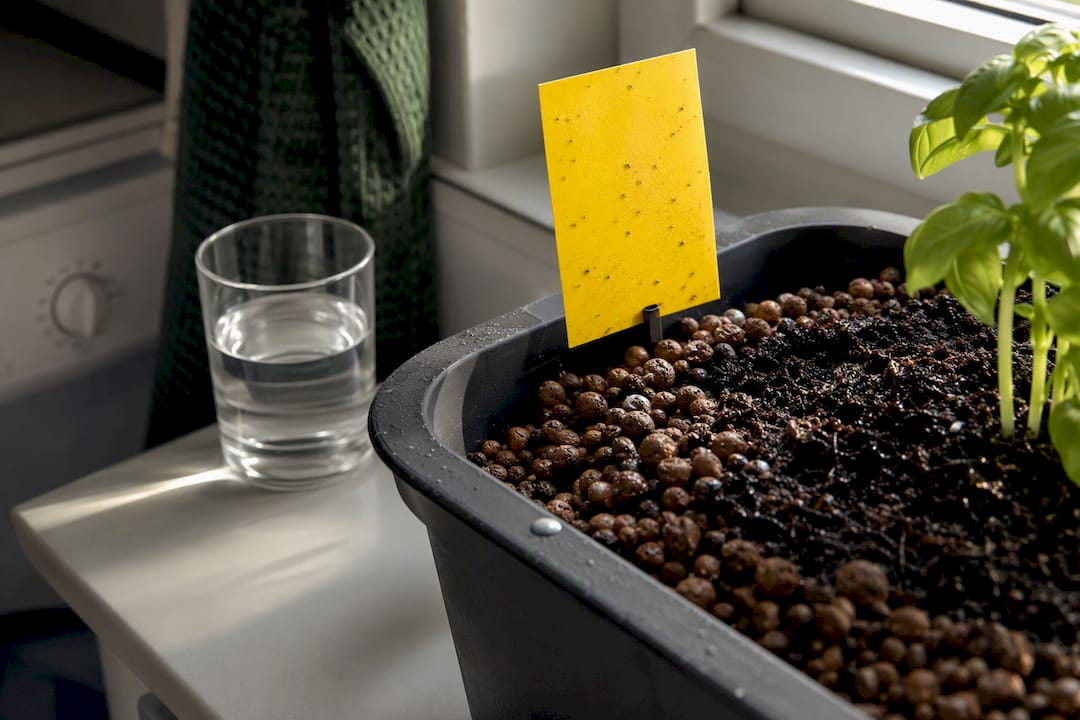
Fungus gnats are the most common nuisance indoors, drawn to damp growing medium. Letting the top layer of your growing medium dry slightly between waterings, where the crop allows it, discourages them without harming root uptake in the reservoir below. Yellow sticky traps near the base of your system catch adults before they multiply.
Root rot is the more serious threat, usually caused by low dissolved oxygen or water sitting too warm. Keeping your reservoir below 75°F and making sure your air pump runs continuously in DWC systems prevents the anaerobic conditions that let rot-causing organisms take hold. If roots turn brown and slimy instead of white and firm, that reservoir needs a full drain, clean, and refill immediately.
Since apartments offer fewer outdoor pest vectors than a backyard garden, most problems trace back to overwatering, poor airflow, or a contaminated water source rather than actual insects. Inspecting new seedlings before adding them to an established system catches most issues before they spread.
DIY parts for a Kratky jar, wide-mouth mason jars, net cups, and clay pebbles, are available from hardware stores, garden centers, and general online retailers, usually for a few dollars per component. This route suits anyone who enjoys tinkering and wants to keep costs as low as possible on their very first jar.
Packaged kits solve the guesswork by bundling a reservoir, pump, net cups, and starter nutrients into one box. Countertop plug-and-play systems have become popular specifically because they remove the trial-and-error of sourcing compatible parts separately. For apartment dwellers without much gardening background, that convenience often outweighs the modest price difference over building your own.
Sprout Lab sells modular hydroponic kits, grow lights, and nutrient mixes designed around exactly this kind of compact, beginner-friendly setup, along with the step-by-step Kratky jar tutorial many first-time growers start with. Whichever route you take, prioritize a supplier that documents its growing medium and nutrient ratios clearly. Vague instructions cause more failed first cycles than any actual hardware problem.
Your first jar will probably look unimpressive for the first ten days, and that’s normal. Most beginners panic around day five, convinced nothing is happening, then watch roots and leaves take off all at once once germination catches up.
Start with one herb or lettuce jar, not three. Apartments’ stable indoor conditions make hydroponics more forgiving than people expect, but a single system teaches you more than a fleet of five you can’t monitor closely. For readers who’d rather skip the trial-and-error entirely, Sprout Lab’s kits and support resources exist to shortcut that learning curve.
— Irwin Lee
Some companies offer modular hydroponic systems that grow many plants in a footprint suitable for most apartments, paired with soil mixes, grow lights, and nutrient solutions matched to various plants.

Such setups are often designed to run with minimal daily attention beyond a weekly check and can be suitable for renters without requiring drilling or permanent fixtures. Compact modules can fit into kitchen corners or shelves without looking out of place. Some providers also offer personalized guidance for those unsure where to start.
If you’re ready to move past the mason jar and want a system built to scale with you, browse Sprout Lab’s hydroponic kits and supplies and pick the setup that matches your space.
For pH and EC ranges, see UC Master Gardener guidance and the IFAS Kratky method overview.
Yes, for most apartment dwellers who want fresh herbs and greens without soil mess. A single starter jar costs as little as $25 to $100 and typically pays back that cost within a couple of harvest cycles compared to store-bought herbs.
For most beginners, a passive Kratky jar or a single countertop DWC unit is the best starting point, since both fit small footprints and demand minimal daily attention. Readers who want a supported, plug-and-play option often choose a modular kit built for compact spaces instead of assembling parts individually.
The main drawbacks are the upfront learning curve around pH and EC management, dependence on electricity for active systems like DWC, occasional pump noise, algae buildup in reservoirs left in light, and the risk of spills if trays aren’t used. None of these are difficult to manage once you know what to watch for, but they do require more attention than simply watering a soil pot.
Yes, hydroponic gardens are safe for home use as long as basic electrical safety around pumps and lights is followed and reservoirs are placed on a tray to prevent water damage. Keeping nutrient solution pH between 5.5 and 6.5 and EC around 1.5 to 2.5 mS/cm, as recommended by UC Master Gardener guidance, also keeps plants healthy enough to eat safely.