Free shipping for order over $50

Free shipping for order over $50
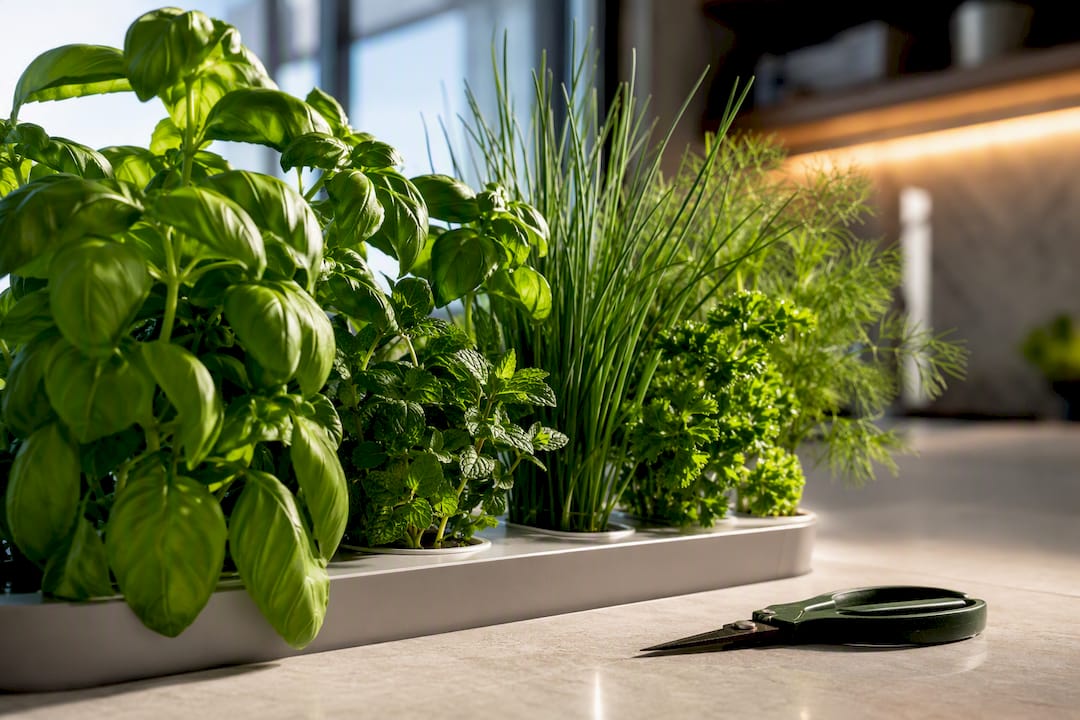
Yes, you can grow culinary herbs indoors hydroponically, and most varieties do it faster than soil ever could. For your first run, skip the fancy gear: a small Kratky jar or a compact DWC (Deep Water Culture) bucket offers a good balance of speed, low maintenance, and forgiveness for mistakes. Get the light, pH, and oxygen right, and the rest takes care of itself.
TL;DR:
- Basil, mint, chives, parsley, and dill grow quickly and tolerate minor nutrient fluctuations, with first harvests typically in 21 to 30 days.
- Starting with a Kratky jar helps beginners learn root health and water quality without relying on equipment that can fail.
- A six-pod Deep Water Culture system offers a reliable, fast-growing setup that produces visible results within three to four weeks.
- Maintaining pH between 5.8 and 6.2 and ensuring proper lighting and oxygen levels are key to preventing nutrient lockout and root rot.
- Regular reservoir cleaning every two to three weeks, monitoring pH and EC, and managing light quality can significantly improve plant health and yield.
Basil, mint, chives, parsley, and dill top nearly every list of beginner-friendly picks for a hydroponic herb garden indoor setup, and for good reason. They root fast in water, tolerate minor swings in nutrient strength, and reward you with usable leaves within a few weeks.
Cilantro is trickier. It bolts to seed quickly under indoor lighting and dislikes root disturbance, so treat it as an intermediate project rather than a first crop. Woody Mediterranean herbs like rosemary, thyme, and sage also struggle in standing water systems since they evolved for dry, well-drained soil. Save those for a soil-based pot.
Timelines vary by herb because leaf size, root structure, and growth habit differ:
Stagger your planting by a week or two per herb so you are not overwhelmed with basil one week and nothing the next. Six pods with two herbs each, planted a week apart, keeps a steady supply coming.
The method you pick determines how much attention your herbs need and how quickly they grow. Here’s how the main options stack up for someone growing herbs indoors for the first time.
Power outages expose the real difference between these methods. Kratky and wick systems keep running with zero electricity, since gravity and capillary action do the work. DWC tolerates a short outage because the reservoir holds a buffer of water and dissolved oxygen. NFT and aeroponic setups have almost no buffer. A few hours without power can stress or kill the crop.
Pro Tip: Start with a Kratky jar for your very first herb, even if you plan to buy a DWC kit later. It teaches you to read root health and water color without any equipment that can fail on you.
A six-pod DWC countertop unit is the sweet spot for most home growers: small enough for a kitchen counter, active enough to grow noticeably faster than a passive jar.
Parts list:
Assembly and planting steps:
For the first two weeks, keep your grow light 6 to 12 inches above the seedlings and adjust as they stretch upward. Top off the reservoir with plain water every two to three days as the level drops. Hold off on a full reservoir change until the two-week mark, then start the regular cycle described below. Pinch the top set of leaves on basil and mint once they hit four true leaves. That single snip forces the plant to branch instead of growing one tall, leggy stem.
Two numbers separate a thriving herb garden from a collapsing one: pH and EC (electrical conductivity, a proxy for nutrient strength). Get these wrong and you get nutrient lockout, where roots physically cannot absorb the minerals sitting right next to them.
Target a pH between 5.5 and 6.5, aiming for the tighter band of 5.8 to 6.2 whenever possible. For EC (electrical conductivity), most leafy herbs do well in a moderate range suited to their nutrient needs. Test both regularly with a simple meter or drop kit, and adjust pH gradually with small amounts of pH up or down solution.
Lighting matters just as much as chemistry. In a room with limited or no natural light, using a full-spectrum LED grow light with sufficient wattage for your system size helps prevent leggy, stretched growth. Running grow lights for around 14 to 16 hours daily typically supports healthy, aromatic herb production. Supplementing with natural light when available can also improve results.
Maintenance follows a simple rhythm: top off with plain water every few days as evaporation lowers the level, then do a full reservoir change every 2 to 3 weeks to flush out accumulated salts. Skipping the full change is the single most common reason a healthy-looking garden crashes overnight.
Most problems trace back to one of three causes: light, chemistry, or oxygen. Matching the symptom to the cause saves you from guessing.
A surprising number of beginners blame their nutrient brand for basil failures when the real culprit is light quality or a reservoir that has not been fully changed in a month. Check those two things first, every time, before you reach for a different fertilizer.
Pro Tip: Keep a small notebook or phone note logging pH, EC, and reservoir change dates. Patterns that seem random in the moment, like consistent yellowing every third week, jump out once you see the dates lined up.
Build a preventive cadence and most of this becomes moot: clean the reservoir every 2 to 3 weeks, check pH weekly, keep mint and other aggressive spreaders in their own pod, and resist the urge to add extra nutrients “just in case.” Overconcentrating solution causes more damage than slightly under-feeding.
Footprint and finish matter more than most buying guides admit. A tall, narrow reservoir fits a kitchen counter corner better than a wide, shallow one, and matte finishes hide water spots better than glossy plastic. Opaque reservoirs are not just practical for blocking algae growth. They also look cleaner than a see-through tank with roots and green film visible from across the room.
Noise and cords are the two things people underestimate before buying. A small air pump for DWC produces a low, steady hum, quieter than most refrigerators, but position it away from a headboard or a home office if sound bothers you. Cordless does not really exist for active systems since the pump needs power, but you can route the cord along a wall or under a cabinet lip to keep it out of sight. Passive Kratky jars have no cord at all, which is part of why they work so well on open shelving.
For styling, treat the herb garden as part of your kitchen decor rather than a science project parked on the counter. Group pods together rather than spacing them randomly. Choose a spot with easy reach for daily harvesting, since a system tucked behind other appliances gets ignored and dries out. A modular planter arrangement also lets you add pods later without buying a whole new unit.
This guide draws on years spent testing compact growing setups for apartments and small kitchens, the exact conditions most first-time hydroponic growers actually face. Sprout Lab built its approach around making home gardening accessible, pairing modular hydroponic systems with soil mixes tailored to specific plant needs. Its countertop hydroponic systems scale from a single herb pod up to 56 plants in one compact footprint, which matters for anyone in a small apartment who wants to expand later without starting over. Customers report fast germination and steady plant health with these hydroponic systems, reflected in a high rating from a large number of completed orders.
Tap water works for most home growers, but the details depend on your municipal supply. Chlorine and chloramine, added to make tap water safe to drink, can slow beneficial microbial activity in the reservoir at high concentrations. Letting tap water sit uncovered for 24 hours lets chlorine dissipate naturally, though chloramine needs a dechlorinating drop or a carbon filter to remove fully.
Hard water, common in many municipal systems, carries high mineral content that skews your EC readings before you even add nutrients. If your tap water tests above 300 parts per million of dissolved solids, expect to use less nutrient concentrate than the bottle recommends, since minerals already in the water count toward your total EC. Test your plain tap water’s EC and pH once before you start so you know your baseline instead of guessing.
Filtered water, whether from a basic carbon pitcher or a reverse osmosis system, gives you a cleaner starting point and more predictable results, especially useful once you start troubleshooting nutrient issues. Distilled water strips out minerals entirely, which sounds ideal but actually means you are adding every single nutrient from scratch. That gives you precise control but zero margin for error if your nutrient mix is incomplete.
For a first system, plain tap water left to sit overnight is fine. Move to filtered water only if you notice persistent pH swings or mineral crust building up around your reservoir waterline.
Most culinary herbs thrive between 65 and 75 degrees Fahrenheit, both for the air around the leaves and the water in the reservoir. Above 80 degrees, water holds less dissolved oxygen, which stresses roots and speeds up algae growth even in an opaque reservoir. Below 60 degrees, growth slows dramatically, and germination can stall entirely.
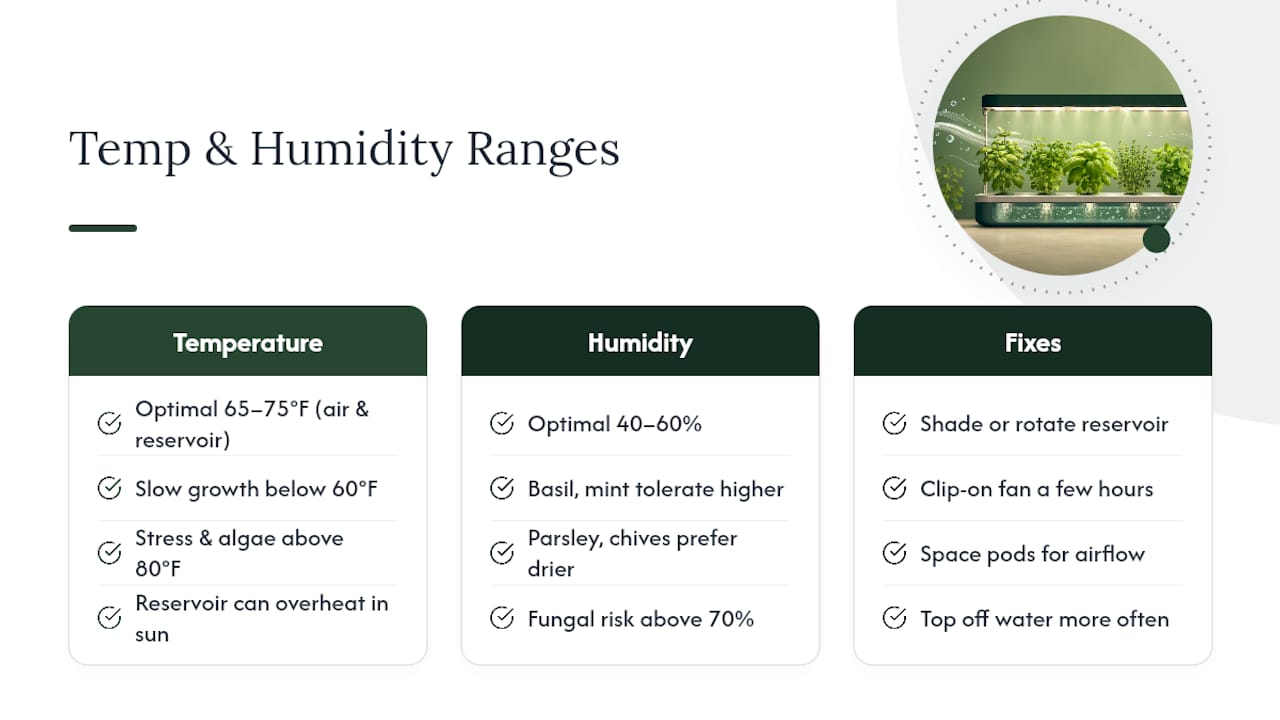
Reservoir water temperature matters more than most guides mention. A reservoir sitting directly on a sunny windowsill can climb well above the surrounding room temperature by midday, cooking roots even while the air feels comfortable. If your setup sits near a window, rotate it or add a small barrier to block direct afternoon sun from hitting the reservoir itself.
Humidity in the 40 to 60 percent range suits most herbs well. Basil and mint tolerate slightly higher humidity, while parsley and chives prefer the drier end of that range. Very low humidity, common in air-conditioned apartments, speeds up water evaporation from both the reservoir and the leaf surface, so expect to top off more frequently in a dry room. Very high humidity above 70 percent raises the risk of fungal issues on crowded leaves, so space your pods to allow airflow between plants rather than crowding six pods into a tight cluster.
A small clip-on fan running a few hours a day helps in both directions: it strengthens stems against sagging and keeps humidity from stagnating around dense foliage.
Harvest technique affects how fast your plant regrows, not just how much you get on the first cut. For basil, mint, and other leafy herbs, snip stems just above a node, the point where a pair of leaves meets the stem, rather than pulling individual leaves off. Cutting above a node triggers two new stems to branch out from that point, roughly doubling your future yield from the same plant.
Harvest in the morning when possible. Essential oil concentration in herb leaves tends to be highest before the day’s heat causes it to dissipate, so a morning cut gives you more flavor and aroma than an evening one. Never take more than a third of a plant’s total foliage in a single harvest. Stripping more than that stresses the root system and slows recovery.
For parsley and chives, cut from the outer, older stems first, letting the inner, younger growth continue developing. This keeps a continuous cycle going rather than harvesting the whole plant at once and waiting weeks for regrowth.
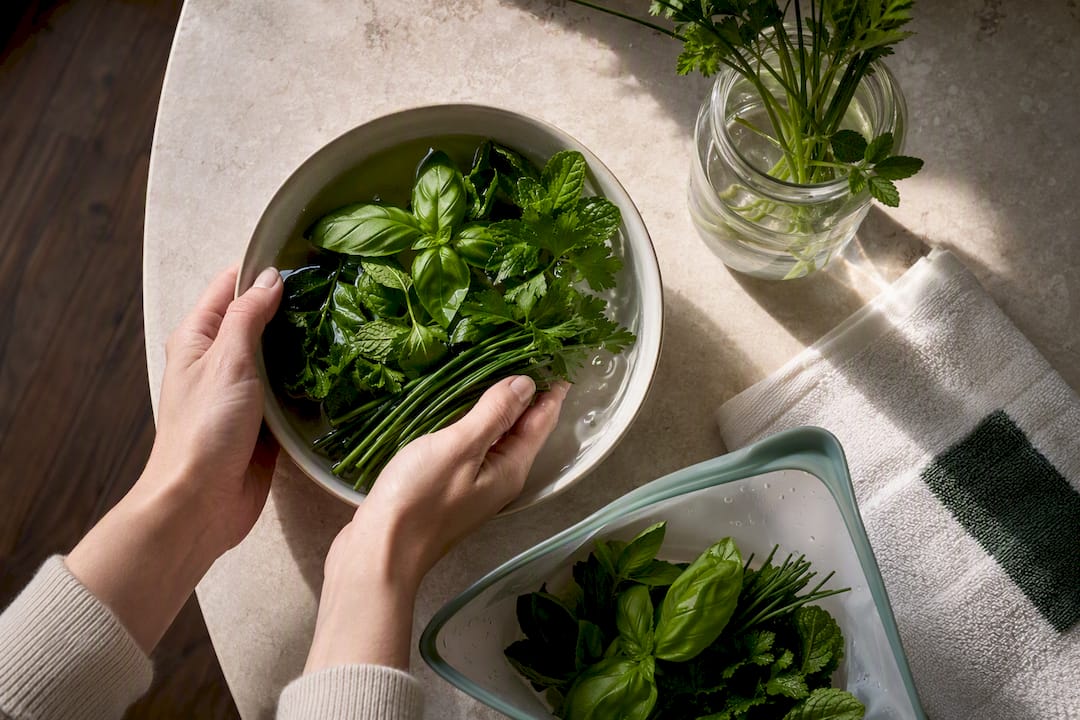
Post-harvest, rinse cut herbs gently in cool water and pat dry rather than wringing, which bruises delicate leaves like basil. Store loosely wrapped in a damp paper towel inside a partially sealed bag in the refrigerator for soft herbs, or stand stems in a small jar of water on the counter like a bouquet for a few extra days of freshness. If you are cooking the same day, skip refrigeration entirely. Fresh-cut herbs lose aromatic oils steadily once chilled, and pairing a same-day harvest with meal prep captures the most flavor.
Indoor hydroponic herbs face a smaller set of pests than outdoor soil gardens, but the ones that do show up spread fast in a warm, humid indoor environment. Fungus gnats and aphids are the two most common visitors, usually arriving on a new seedling or through an open window rather than originating in the water itself.
Fungus gnats lay eggs in damp growing media like coco coir, so a layer of dry clay pebbles on top of the medium disrupts their breeding cycle without any spray. Aphids cluster on new growth and the undersides of leaves. A strong spray of plain water knocks most of them off, and repeating every few days usually breaks the infestation before it spreads.
Root rot deserves separate attention since it is technically a disease rather than a pest, caused by bacteria and fungi thriving in warm, low-oxygen water. Keeping your air pump running continuously, not just occasionally, is the single best prevention step, since consistent oxygenation makes the water inhospitable to the pathogens that cause rot.
Powdery mildew shows up as a white, dusty coating on leaves when humidity stays high and airflow stays low. Spacing pods apart and running a small fan a few hours daily prevents most cases before they start. If you do spot it, remove affected leaves immediately and improve airflow rather than reaching for a fungicide, since most indoor mildew cases resolve once the humidity and crowding issue is fixed.
Quarantine new seedlings for a few days before adding them to an established system. It is a small habit that catches most pest problems before they reach your other pods.
Most guides to indoor herb hydroponics obsess over nutrient formulas and system complexity, as if the fix for every yellow leaf is a fancier fertilizer or a pricier setup. That is backward. In practice, light quality and reservoir hygiene solve more problems than any nutrient tweak ever will, and the data on beginner failures backs this up consistently.
The bigger blind spot is aesthetics, treated as an afterthought when it is actually a retention driver. A system that looks good on the counter gets checked daily. One shoved in a closet because it looks like lab equipment gets forgotten, and forgotten systems crash. That is why compact, good-looking countertop options matter as much as the biology underneath them.
If you take one thing from this guide, prioritize the boring stuff first: consistent light hours, a clean reservoir schedule, and correct pH. Skip the temptation to chase exotic herbs or complicated NFT rigs until a simple DWC bucket has taught you to read your plants. That single Kratky jar of basil on your windowsill will teach you more in three weeks than any spec sheet.
— Irwin Lee
You now know the biology. The remaining question is which system saves you the most trial and error on your first run. Modular countertop systems are designed for apartment kitchens, first-time growers, and to address the common frustration of soil herb pots failing on windowsills. The Reservoir Hydroponic System beginner’s guide walks through picking the right DWC size for your counter space, while the compact growing systems overview helps you compare footprints before you commit.

For most first-time growers, a 6-pod starter kit strikes the right balance between visible progress and manageable upkeep. Plant basil or mint in week one, and you can expect a usable first harvest within three to four weeks, right in line with the timelines covered earlier. If you are ready to stop guessing at pH strips and start harvesting, browse starter hydroponic systems and pick the size that fits your counter today.
The pH, EC, timeline, and maintenance figures in this guide come from a small set of dedicated hydroponic gardening resources, cross checked against each other for consistency: the Indoor Hydroponic Herb Garden beginner’s guide, Urban Grown Home’s hydroponic herb garden guide, Serious Eats’ indoor herb garden reviews, and the Hydro Green Space full guide.
Yes. Basil, mint, chives, parsley, and dill all grow reliably in indoor hydroponic systems, often reaching harvest faster than the same herbs planted in soil.
Basil, mint, chives, and dill perform best for beginners, with first harvests typically arriving in 21 to 30 days. Parsley works well too but takes longer, usually 35 to 45 days.
Basil is the best starting point. It roots quickly, tolerates minor mistakes in pH or nutrient strength, and reaches first harvest in as little as three weeks.
Yes, though herbs are the easiest starting category. Leafy greens like lettuce and small salad crops follow similar pH and EC ranges, making them a natural next step once you have run a successful herb crop in a system like Sprout Lab’s countertop hydroponics.
Most beginner-friendly herbs are ready in 3 to 6 weeks, with basil on the fast end at 21 to 28 days and parsley on the slower end at 35 to 45 days.