Free shipping for order over $50

Free shipping for order over $50
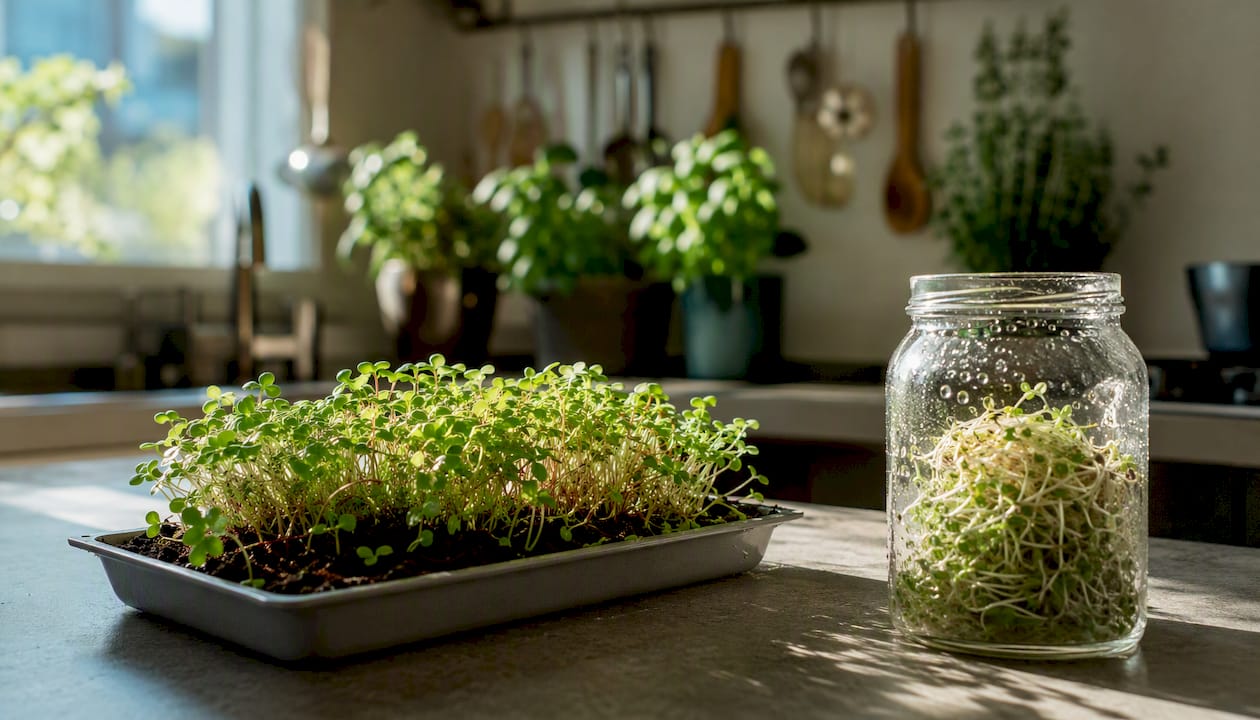
Microgreens and sprouts are not the same thing. Sprouts are seeds germinated in water and eaten whole, root to tip, within 2–7 days. Microgreens are seedlings grown in soil or a soilless medium, harvested above the root after 7–21 days once they’ve had light to photosynthesize. That single difference in growing environment drives nearly every other contrast between them.
Here’s what that means in practice:
Who should pick which? If you want the fastest, cheapest start with minimal gear, try sprouts. If you’re safety-conscious, cooking for children or immunocompromised people, or want a wider flavor range for cooking, microgreens are the stronger choice for most urban growers.
Microgreens and sprouts are nutritionally complementary, not interchangeable, and the growing environment is what drives every practical difference between them.
| Point | Details |
|---|---|
| Core distinction | Sprouts are eaten whole after water-only germination (2–7 days); microgreens grow in medium under light and are harvested above the root (7–21 days). |
| Nutrition trade-off | Sprouts tend to be higher in polyphenols and vitamin C; microgreens are higher in carotenoids, chlorophyll, and vitamin K due to photosynthesis. |
| Food safety | Sprouts are a federally recognized higher-risk produce category; immunocompromised people, children, and pregnant people should avoid raw sprouts. |
| Shelf life | Sprouts keep 3–7 days refrigerated; microgreens keep 10–14 days under ideal storage conditions. |
| Sprout-lab recommendation | Sprout-lab’s Microgreen Grow Kit is the lowest-effort starting point for urban growers who want nutrition, safety, and a repeatable harvest. |
According to a PMC review, sprouts and microgreens differ across every major production variable, from harvest window to light requirements. Here’s the side-by-side:
| Attribute | Sprouts | Microgreens |
|---|---|---|
| Harvest time | 2–7 days | 7–21 days |
| Growing medium | Water only (jar/bag) | Soil, coco coir, or hydroponic mat |
| Light requirement | None (darkness or indirect) | Direct light or grow light needed |
| Edible parts | Whole plant: root, seed coat, stem | Stem and cotyledon leaves only |
| Food-safety risk | Higher (warm, moist, low-oxygen) | Lower (grown above medium, under light) |
| Shelf life (refrigerated) | 3–7 days | 10–14 days |
| Common uses | Sandwiches, salads, raw snacking | Garnishes, salads, smoothies, plating |
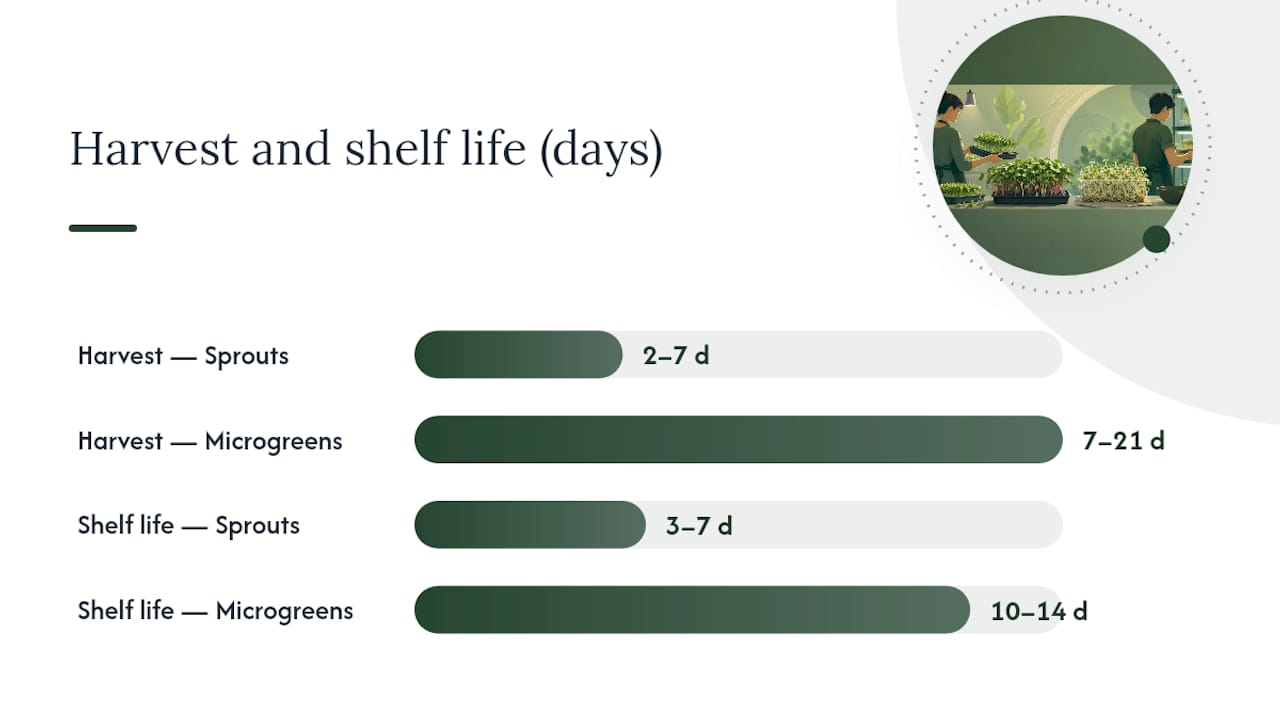
The shelf-life gap is bigger than most people expect. Sprouts are delicate and start to degrade quickly once harvested, while microgreens stored in a sealed container with a paper towel to absorb moisture can stay crisp for up to two weeks. For anyone growing at home and trying to reduce waste, that matters.
Sprouts are seeds that have germinated and are eaten in their entirety, including the root, seed coat, and young stem, typically within 2–7 days of soaking. No soil, no light, no tray required. The whole process happens in a jar or sprouting bag with nothing but water and rinsing.
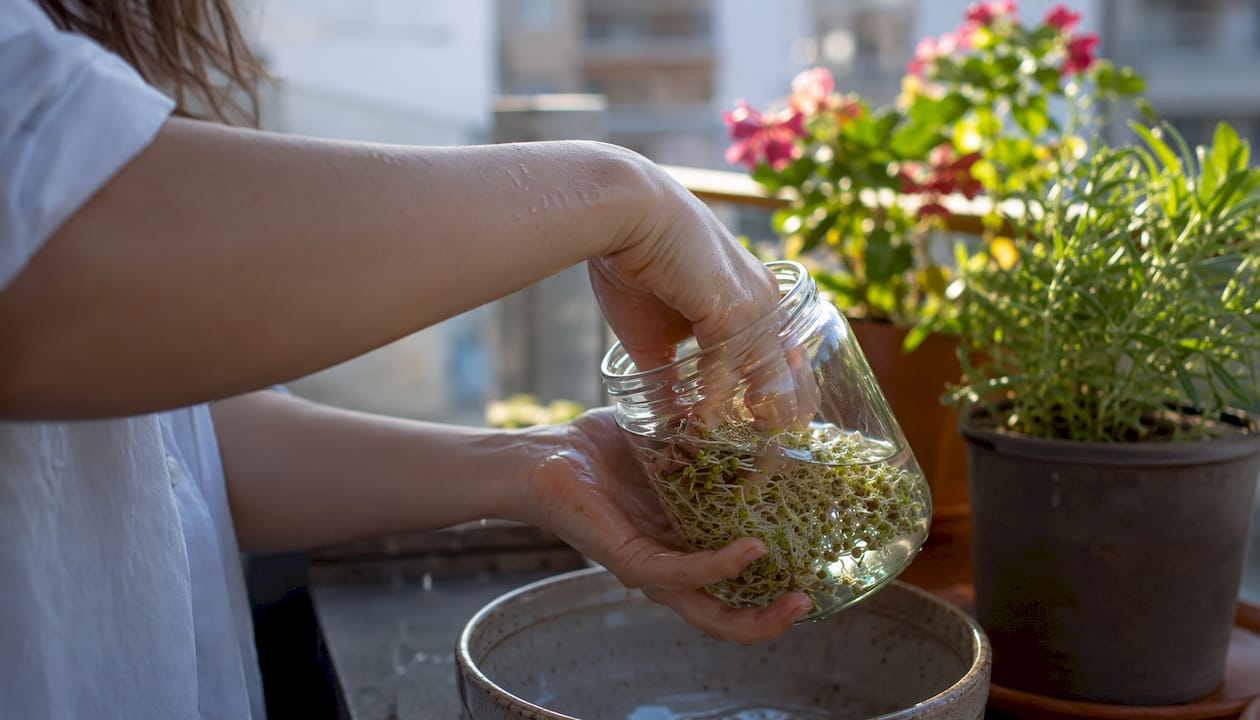
Common sprouting seeds: alfalfa, mung bean, broccoli, lentil, radish, and fenugreek. Mung beans are the classic bean sprout found in Asian cooking. Broccoli sprouts are popular for their sulforaphane content. Alfalfa produces the fine, delicate sprouts common in deli sandwiches.
Basic sprouting process:
Species choice matters beyond flavor. Larger seeds like lentils and mung beans are more forgiving for beginners. Tiny seeds like alfalfa can clump and develop mold if airflow is poor. For a detailed walkthrough of home jar sprouting, the Sprout-lab jar sprouting guide covers setup and safety tips step by step.
Pro Tip: Use food-grade sprouting seeds from a dedicated supplier, not garden seeds treated with fungicide. Rinse at least twice daily with cool water, and never let water sit in the jar. Stagnant moisture is the primary driver of mold and bacterial growth.
Microgreens are young seedlings harvested at the cotyledon stage, sometimes with the first true leaves just emerging, after 7–21 days of growth. Unlike sprouts, they’re grown in a tray of soil or a soilless medium like coco coir or a hydroponic grow mat, and they need light to develop their characteristic flavor and nutrition. You eat only the stem and leaves above the growing medium, leaving the roots behind.
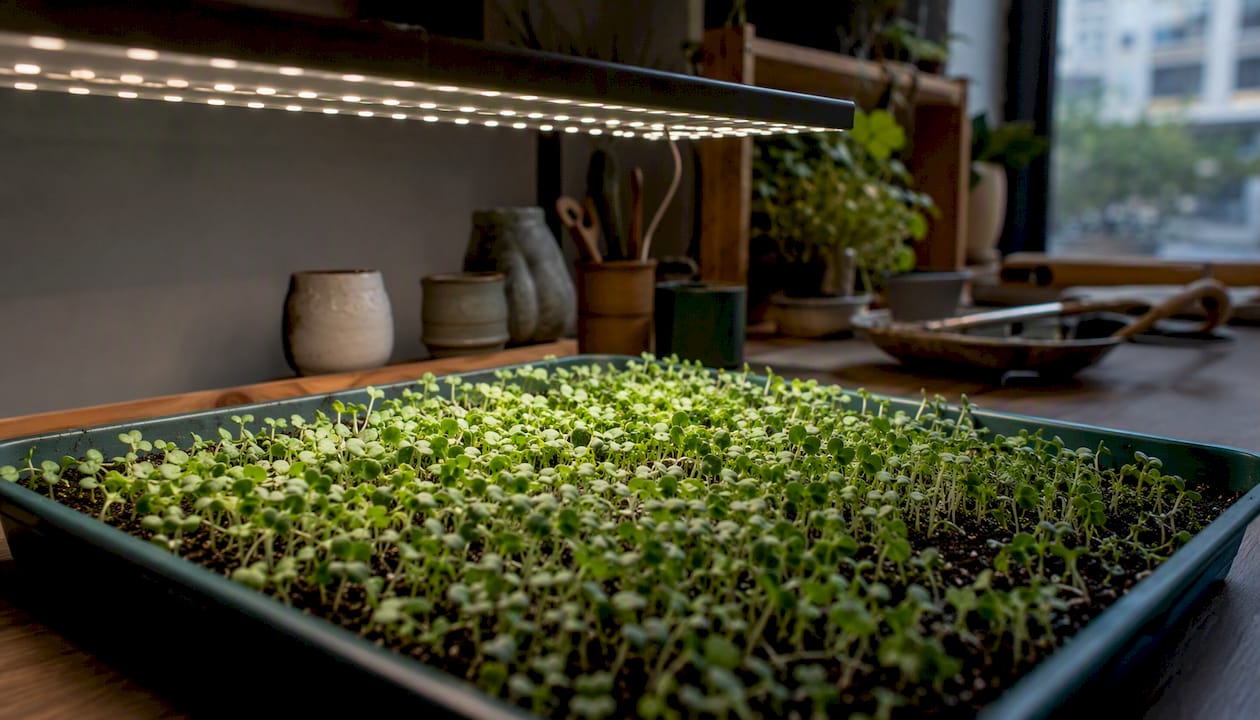
Extension research from the University of Maryland describes microgreens as nutrient-dense functional foods that are well-suited to small-space urban production, with concentrated vitamins and minerals relative to their size.
Popular microgreen varieties and what makes each worth growing:
Basic growing steps:
For tight spaces, a south-facing windowsill works for many varieties. If natural light is inconsistent, a basic LED grow light makes a significant difference in yield and color. The Sprout-lab windowsill growing guide covers light placement and spacing for apartment setups.
Pro Tip: Pre-soak larger seeds like peas and sunflowers for 8 hours before seeding. Smaller seeds like broccoli and radish don’t need soaking. Pre-soaking larger seeds dramatically improves germination uniformity across the tray.
Both are nutrient-dense, but they’re dense in different things, and the distinction comes down to biology. Sprouts draw on compounds stored in the seed itself, concentrating polyphenols, enzymes, and vitamin C during germination. Microgreens develop carotenoids, chlorophyll, and vitamin K through photosynthesis once they’re exposed to light. Neither is universally superior.
A peer-reviewed study published in Molecules found that sprouts showed higher measured polyphenols and L-ascorbic acid and stronger antioxidant capacity in several assays (ABTS, FRAP, ORAC), while microgreens had higher carotenoids and chlorophylls and stronger anti-diabetic and anti-cholinergic activity in some species. The researchers recommended both as daily functional foods, not one over the other.
Nutrient strengths by category:
A separate PMC metabolic profiling study reinforces a key caveat: species variation is large. Broccoli microgreens and radish sprouts don’t behave like generic “microgreens” or “sprouts.” The nutrient content of a specific variety can differ more from another variety of the same type than it differs from the opposite category. Most studies also use in-vitro assays, which measure potential bioactivity in a lab, not necessarily what your body absorbs from a salad.
The practical takeaway: if you want carotenoids and chlorophyll, grow microgreens. If you want polyphenols and vitamin C from a fast, cheap source, sprouts deliver. Growing both covers more nutritional ground than either alone.
Sprouts are a higher-risk fresh produce item. That’s not a fringe opinion; it’s the position of U.S. federal food-safety authorities. Foodsafety.gov lists sprouts as a known high-risk category, with Salmonella and E. coli as the primary concerns.
The mechanism is straightforward. Sprouting happens in warm water, in low-oxygen conditions, with seeds that may carry surface pathogens. Those conditions are nearly ideal for bacterial growth. The seed coat itself can harbor bacteria that no amount of rinsing fully eliminates. Microgreens, by contrast, grow above a medium under light and are harvested away from the seed coat, which removes the primary contamination vector.
The FDA’s FSMA Produce Safety Rule reflects this risk difference at the commercial level. Sprout producers face stricter testing and documentation requirements than microgreen producers because the sprouting environment is harder to control for pathogens.
Practical safety steps for home growers and buyers:
Who should avoid raw sprouts entirely: Pregnant people, adults over 65, young children, and anyone immunocompromised should skip raw sprouts. Cooking sprouts until steaming hot eliminates the pathogen risk if you still want the flavor.
Pro Tip: For home sprouting, a 1-minute soak of seeds in a 3% hydrogen peroxide solution before the initial water soak is a widely used pre-treatment that reduces surface pathogen load. Rinse thoroughly with clean water afterward before beginning the normal sprouting process.
Both are genuinely beginner-friendly. The difference is in the daily routine. Sprouts need rinsing twice a day but no light and no medium. Microgreens need less daily attention once set up, but they require a tray, growing medium, and a consistent light source. For urban beginners starting from scratch, here’s the fastest path to a first harvest for each.
Pro Tip: Stagger two or three jars or trays started 5–7 days apart. You’ll have a continuous harvest instead of a feast-or-famine cycle, and you’ll waste far less.
Not every seed works equally well for both methods, and choosing the right variety for the right method makes the difference between a reliable harvest and a frustrating first attempt.
For sourcing, always buy seeds labeled specifically for sprouting or human consumption from a reputable supplier. The Sprout-lab sprouting seed sourcing guide covers what to look for when buying seeds online.
Broccoli is the one variety that works well as both a sprout and a microgreen, but the nutritional profiles differ. Broccoli sprouts are studied primarily for glucosinolate/sulforaphane precursors. Broccoli microgreens develop more carotenoids and chlorophyll. They’re genuinely different foods from the same seed.
Microgreens deliver concentrated, often peppery or savory flavors and keep longer in the refrigerator. Sprouts offer fresh crunch and milder flavor but need to be used within a week. Knowing how to store each one properly cuts waste significantly.
Sprouts work well in:
Microgreens work well in:
For recipe inspiration that integrates microgreens into everyday meals, the seed-based meal ideas from Wild Foodz offer practical plating and pairing ideas across breakfast, lunch, and dinner.
The right choice depends on your situation, not on which one is “better” in the abstract. Here’s a direct match:
Choose sprouts if you:
Choose microgreens if you:
Grow both if you:
A practical grower analysis from Grown Like A Pro notes that microgreens tend to be the better fit for small and urban growers due to lower category-level food-safety risk and higher retail margins per pound. For home growers, the margin argument matters less, but the safety and shelf-life advantages still apply.
Suggested first steps:
The research and the practical evidence point in the same direction. Microgreens offer a better safety profile, a longer shelf life, and a wider flavor range than sprouts, with only a modest increase in setup complexity. For anyone growing in a small apartment, cooking for a family, or thinking about scaling to a small market garden, microgreens carry less risk and more upside.
Sprouts have real value, particularly for fast, cheap nutrition and for cooked applications. But the food-safety reality is not a minor footnote. The CDC and FDA have documented multiple Salmonella and E. coli outbreaks linked to raw sprouts over the past two decades, and the sprouting environment is genuinely difficult to control at home without strict discipline around rinsing and sanitation.
Sprout-lab’s customers, who have placed over 25,000 orders with a 4.9/5 rating, consistently report that the compact tray-based microgreen setup is the entry point that sticks. It’s repeatable, the results are visible, and the harvest is something you’d actually want to put on a plate. Sprouts are worth trying, but microgreens are where most urban growers find their rhythm and keep going.
If you’ve been on the fence about trying microgreens, the setup is simpler than it looks. Sprout-lab’s Microgreen Grow Kit gives you everything in one place: a compact tray system, curated growing medium, and clear instructions designed for beginners with no prior gardening experience.

The kit fits on a countertop or windowsill, requires no yard or outdoor space, and produces a harvestable crop in under three weeks. For anyone who wants to skip the trial-and-error phase of sourcing trays, medium, and seeds separately, it’s the most direct path from “thinking about it” to “eating it.”
If you’re ready to scale beyond a single tray, Sprout-lab’s automated hydroponic setups for urban growers let you run multiple varieties simultaneously in a compact footprint, with systems that support up to 56 plants in a small space. Browse the full range and find the setup that fits your space and goals.
Microgreens carry lower food-safety risk at the category level. Foodsafety.gov identifies raw sprouts as a higher-risk produce item due to the warm, moist sprouting conditions that favor Salmonella and E. coli growth.
Yes, for most healthy adults. Microgreens are nutrient-dense and generally safe for daily consumption; University of Maryland Extension research describes them as a practical way to boost vitamins and carotenoids in home diets.
Broccoli microgreens are among the most studied for nutrient density, with high levels of carotenoids and glucosinolate precursors. Kale microgreens are also strong performers for vitamin K and carotenoids, per the Molecules study.
They’re different, not interchangeable. Broccoli sprouts tend to be higher in polyphenols and vitamin C; broccoli microgreens develop more carotenoids and chlorophyll through photosynthesis. The PMC metabolic profiling research confirms that species-specific variation is large enough that both are worth including in a varied diet.
Most varieties are ready to harvest in 7–21 days. Fast varieties like radish are done in 6–10 days; slower ones like kale or amaranth take closer to 14–21 days, as documented in the PMC production review.