Free shipping for order over $50

Free shipping for order over $50
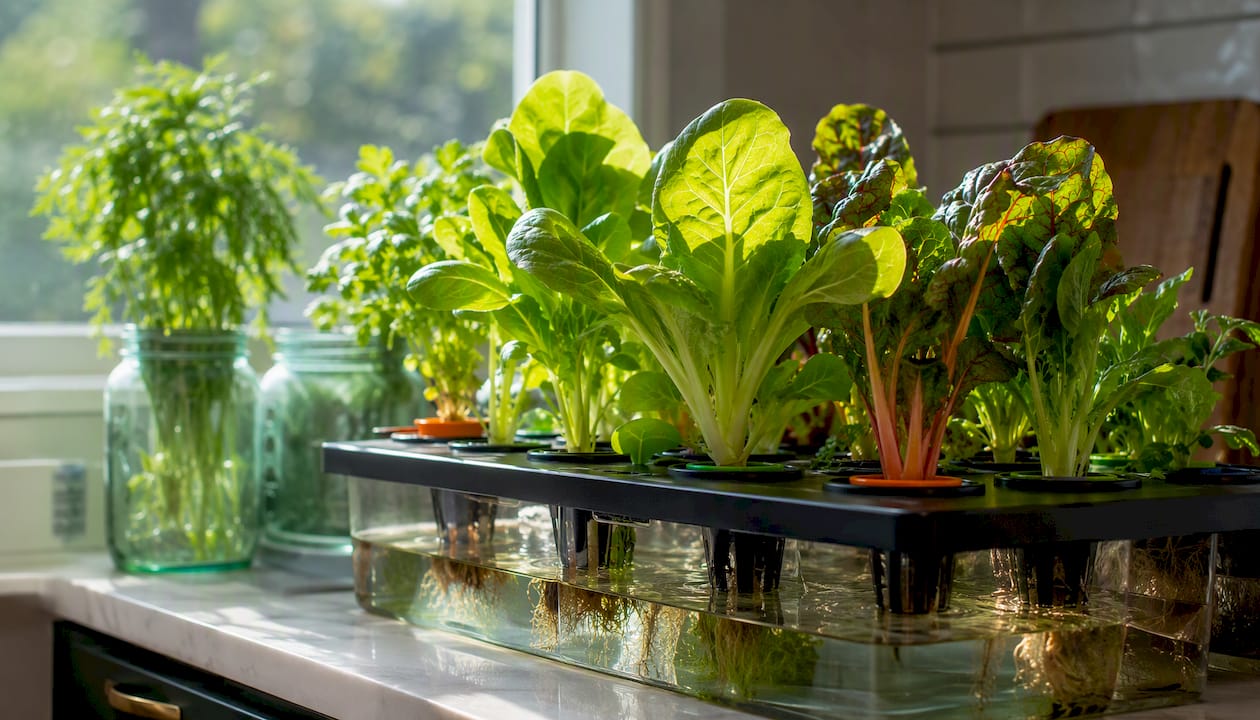
The easiest hydroponic vegetables to start with are looseleaf lettuce, baby spinach, basil, arugula, bok choy, mint, and microgreens. Pair any of them with a Kratky passive setup or a small deep water culture (DWC) tote, and you can have your first harvest in as little as three weeks. These crops share three traits that make them forgiving for beginners: short growth cycles, low electrical conductivity (EC) needs, and tolerance for modest indoor light.
The fastest beginner shortlist:
Pro Tip: Start with a single Kratky jar and one packet of looseleaf lettuce seeds before buying anything else. One successful harvest teaches you more about pH and EC than any guide can.
Looseleaf lettuce, microgreens, and basil are the fastest and most forgiving crops for beginners, and a Kratky jar or small DWC tote is all the system you need to get your first harvest in under six weeks.
| Point | Details |
|---|---|
| Start with the right crops | Looseleaf lettuce, microgreens, basil, and arugula finish fast and tolerate minor beginner errors. |
| Match system to space | Kratky jars for one to two plants; a small DWC tote for four to eight plants on a shelf or counter. |
| Monitor EC and pH first | Target EC 0.8–1.2 mS/cm and pH — for leafy greens; check twice per week minimum. |
| Harvest windows are short | Microgreens in 7–21 days; lettuce and basil in 28–45 days; spinach in 30–50 days. |
| Sprout-lab for ready-made setups | Sprout-lab’s modular systems support up to 56 plants with built-in lighting, pre-configured for leafy cycles. |
Growing vegetables without soil sounds technical, but the practical reality for a beginner with a windowsill or spare shelf is surprisingly straightforward. Plants get nutrients directly from water, which means faster uptake, faster growth, and no weeding. A compact DWC tote on a kitchen counter can outproduce a 4×4-foot soil bed for leafy greens.
The other advantages stack up quickly indoors: no soil-borne pests, no seasonal dependency, and predictable harvest windows regardless of what month it is. You control the inputs, so results are repeatable once you dial in your nutrient mix.
UF/IFAS Gardening Solutions specifically highlights leafy salad crops, mustard greens, mizuna, kale, and soft herbs as strong performers in hydroponic systems, noting they avoid many of the soil pest problems that frustrate beginners in traditional gardens.
For busy people, the low-maintenance system guide at Sprout-lab breaks down how to set up a grow that runs on 10–15 minutes of weekly attention once established.
Leafy greens and soft herbs fall into the lowest EC and light-demand tier, which is exactly why they dominate every beginner shortlist. Here is what you need to know for each crop before you plant.
Per-crop notes:
Pro Tip: For cut-and-come-again greens like looseleaf lettuce and arugula, harvest the outer leaves and leave the center growing. One plant can give you three to four harvests before it bolts, stretching your yield significantly.
The system choice matters more than most beginners expect. Pick the wrong one and you spend more time troubleshooting equipment than growing food.
Kratky (passive, no pump) is the true entry point. Fill a jar or opaque tote with nutrient solution, suspend the plant in a net pot so the roots touch the water, and leave a small air gap above the waterline. As the plant drinks, the gap grows and oxygenates the roots naturally. No pump, no timer, no electricity beyond a grow light. Kratky is ideal for fast, short-cycle leafy crops that finish before the reservoir runs out. Its limit: it does not scale well for long-season crops like tomatoes or peppers, which outgrow the passive oxygen supply.
Small DWC or raft systems add an air pump and air stone to keep the nutrient solution oxygenated continuously. This lets you run multi-plant batches in a single tote and supports slightly heavier feeders like bok choy and basil. Maintenance adds up to checking the reservoir level and EC/pH twice a week.
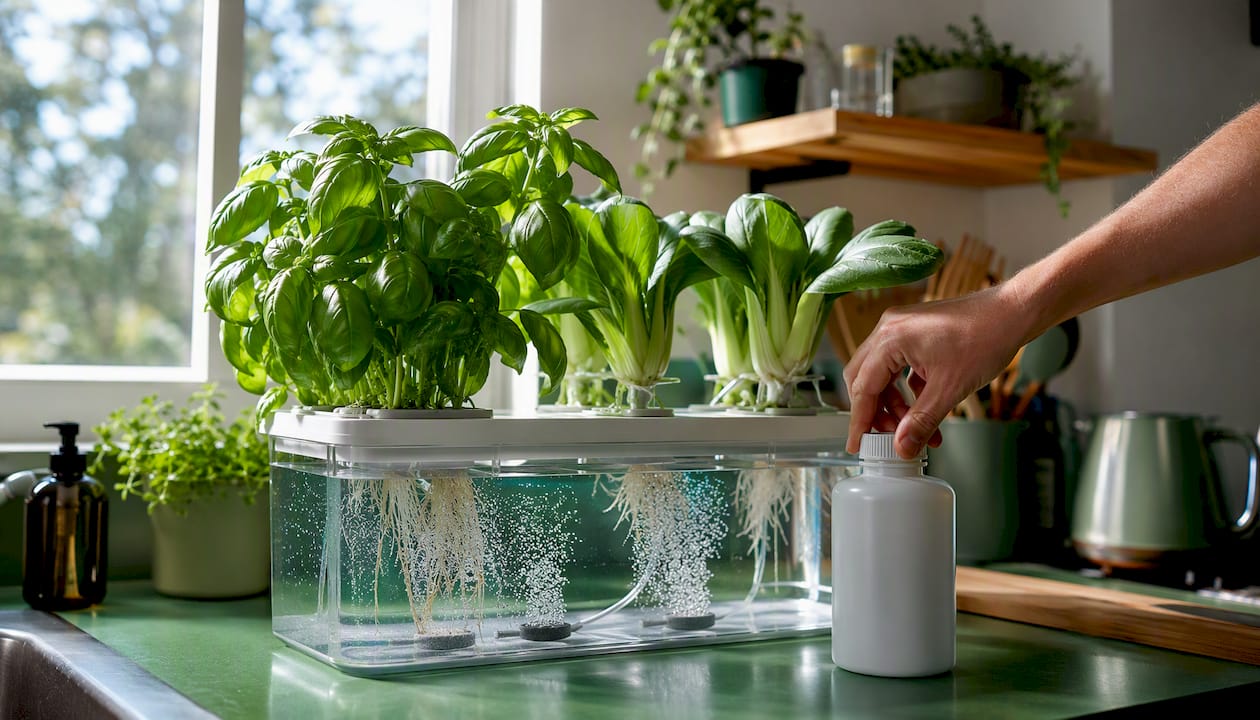
NFT (nutrient film technique) and tower systems work well for herbs and greens but require a small pump and tubing. They are a reasonable step up after your first Kratky or DWC success, not a starting point.
| Reader profile | Recommended system | Why |
|---|---|---|
| Windowsill, one plant at a time | Kratky jar | No electricity, minimal cost |
| Spare shelf, 4–8 plants | Small DWC tote | Consistent oxygen, easy batch growing |
| Balcony or counter, herbs + greens | NFT or tower | Efficient use of vertical space |
| Apartment, want ready-made | Compact modular system | Pre-configured, minimal troubleshooting |
For a deeper look at hydroponic systems for small apartments, Sprout-lab’s guide covers layout options and footprint considerations for tight spaces.
Skip the elaborate shopping lists. Here is what a functional beginner setup genuinely requires:
Approximate starter costs:
Shopping tips: Buy a nutrient concentrate formulated specifically for leafy greens rather than a general-purpose formula. The EC targets are lower and more forgiving for the crops on this list. Always choose opaque containers; clear or translucent ones invite algae within days.
Statistic callout: A mason-jar Kratky build can cost as little as $5–$15 and reliably grow a full head of lettuce on a windowsill, making it one of the lowest-cost entry paths into hydroponic vegetable gardening.
Start every check with these four things: light on schedule, temperature in range (60–80°F for most greens), reservoir level above the pump or air stone, and no yellowing leaves. Do this daily for the first two weeks; it takes under two minutes.
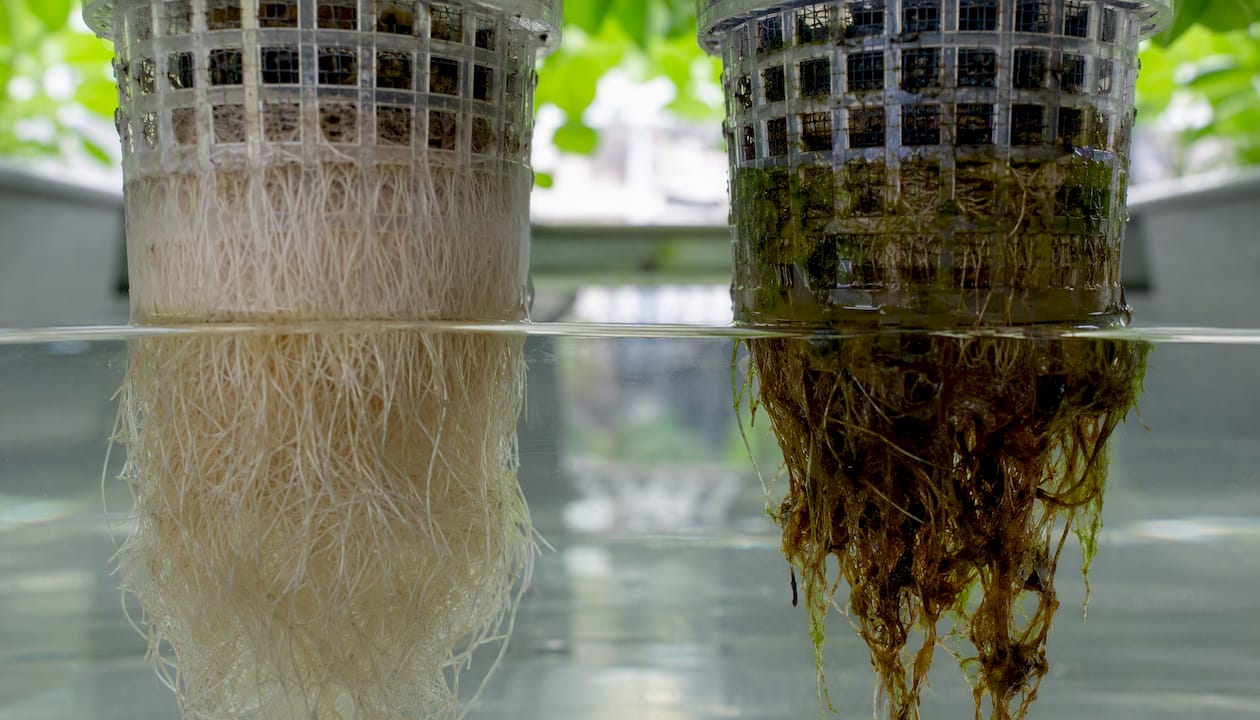
Algae shows up as green slime on reservoir walls or roots. The fix is immediate: cover any light leaks with tape or foil, and replace the nutrient solution. Algae competes with roots for oxygen and nutrients.
Root rot looks like brown, slimy roots with a foul smell. It usually means insufficient oxygen in the reservoir. For DWC, check that the air pump is running and the air stone is not clogged. For Kratky, confirm the air gap exists between the waterline and the net pot base.
Nutrient lockout happens when pH drifts outside the target range, blocking the plant’s ability to absorb nutrients even when they are present. Yellowing leaves despite a full reservoir almost always point here. Check pH first before adding more nutrients.
Pests are rare indoors but not impossible. Fungus gnats appear when growing medium stays too wet near the surface. Aphids occasionally hitch a ride on new seedlings. A yellow sticky trap near the canopy catches both early.
Warning: Over-correcting pH is one of the most common beginner mistakes. Adding too much pH Up or Down at once causes wild swings that stress plants more than a slightly off reading does. Adjust in small increments (0.5 mL at a time), wait 15 minutes, then recheck.
Pro Tip: Keep a small notebook or phone note with your reservoir’s starting EC and pH. When something goes wrong, you will know exactly what changed — and what to fix first.
For a detailed walkthrough of pH monitoring and correction, Sprout-lab’s guide covers the full adjustment protocol step by step.
Most beginners overestimate how long hydroponics takes and underestimate how fast the first harvest arrives.
Harvest windows by crop:
Weekly time commitment: Once established, a 4–8 plant DWC or Kratky setup needs roughly 10–15 minutes per week: a quick visual check daily (30 seconds), EC and pH readings twice a week (5 minutes), and a reservoir top-up as needed. The first two weeks demand slightly more attention while seedlings establish roots.
Running cost note: A small LED grow light (20–40W) and a basic air pump together add a modest amount to your monthly electricity bill. Exact costs vary by local rates, but for most home setups the power draw is comparable to leaving a few LED bulbs on for 16 hours a day.
Cut-and-come-again crops like looseleaf lettuce and arugula reduce replanting labor significantly. Harvest the outer leaves, and the plant keeps producing for another two to four weeks before it bolts.
UF/IFAS extension guidance is direct on this point: neglecting nutrient concentration (EC) and pH is the single most common reason beginner hydroponic setups fail. Plants in soil have a buffer; plants in water do not. When pH drifts or EC climbs too high, nutrient uptake stops within hours.
Simple monitoring protocol for leafy greens:
When EC reads higher than your target after a top-up, the plant is drinking water faster than nutrients, which is normal. Add plain water, not more nutrient solution. When EC drops below target, a small dose of balanced nutrient solution brings it back.
For beginner hydroponic vegetable gardening, start with seeds rather than transplants. Transplants from a garden center carry soil and potential pests into a clean water system.
Seed sources: Look for varieties labeled “loose-leaf,” “butterhead,” or “cut-and-come-again” for lettuce. For basil, Genovese and Lemon basil both perform well in water. Seed packets from reputable suppliers like Johnny’s Selected Seeds, Botanical Interests, or True Leaf Market include germination rates and days-to-harvest on the label, which helps you plan.
Germination method: Place seeds in a moistened rockwool cube or a small plug of coconut coir. Keep them in a warm spot (68–75°F) with a humidity dome or plastic wrap over the top. Most leafy greens germinate in 2–5 days. Once the seedling has a visible root tip (roughly 0.5–1 inch), transfer it to your net pot.
Pro tip for microgreens: Skip the germination step entirely. Scatter seeds densely across a moistened coir mat in a shallow tray, mist daily, and harvest at the cotyledon stage. No net pots, no nutrient solution needed until after the first true leaves appear.
Hydroponics eliminates most soil-borne diseases by design, but a clean water system is not immune to everything.
Rinse thoroughly before refilling. This removes biofilm that harbors pathogens.
Fungus gnats are the most common indoor pest. They breed in moist growing medium near the surface. A layer of dry clay pebbles on top of the medium cuts off their breeding cycle. Yellow sticky traps catch adults before they multiply.
Aphids and spider mites occasionally appear on new seedlings. Inspect every plant before it goes into your system. A quick rinse under the tap removes most hitchhikers. Indoors, a small fan running at low speed improves air circulation and makes the environment less hospitable to both.
Powdery mildew shows up in humid, stagnant air. If you spot white powder on leaves, remove affected leaves immediately and increase airflow. For post-harvest handling and keeping fresh greens crisp longer, storing vegetables without plastic is a practical approach that also reduces waste.
Harvest looseleaf lettuce and arugula by cutting outer leaves at the base, leaving the growing tip intact. This cut-and-come-again method extends the productive life of each plant by two to four weeks. For basil, pinch stems just above a leaf node to encourage branching rather than vertical growth.
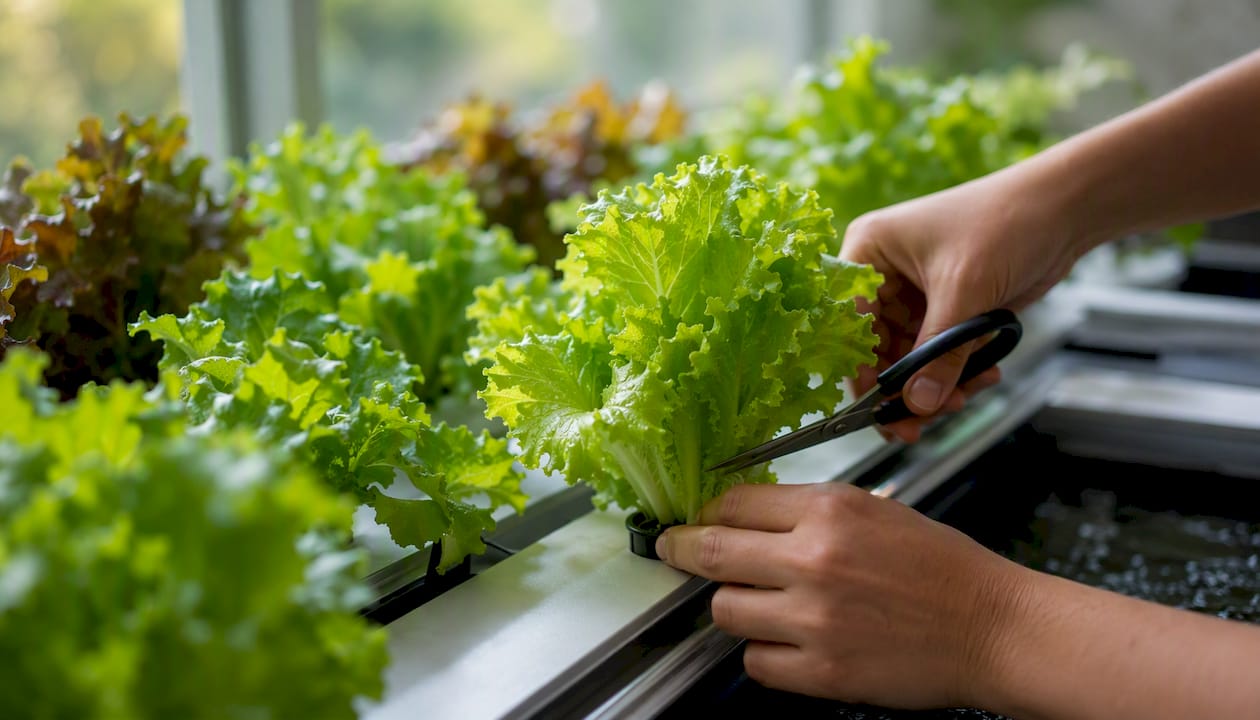
Microgreens are a one-cut crop. Snip them at soil level with clean scissors when the first true leaves appear, or at the cotyledon stage for a more tender texture.
Post-harvest handling: Rinse greens in cold water immediately after cutting. Spin dry or pat with a clean towel, then store in an airtight container lined with a paper towel in the refrigerator. Hydroponic greens tend to be more delicate than field-grown produce because they have not been exposed to wind stress, so handle them gently and use within 5–7 days for best quality.
For herbs like basil, avoid refrigerating. Stand the stems in a small glass of water on the counter, loosely covered with a plastic bag, and they will stay fresh for up to a week at room temperature.
Most beginner failures come down to one of two things: choosing the wrong crop for their light conditions, or ignoring water chemistry until the plant is already struggling.
Fruiting crops like tomatoes and peppers appear on many “beginner hydroponic” lists, and that framing does a disservice. They need high EC (2.0–3.5 mS/cm), intense light (at least 400–600 µmol/m²/s PPFD), structural support, and pollination management indoors. A beginner who starts with tomatoes and a basic LED panel is almost guaranteed to get a spindly, low-yielding plant. Start with greens, learn the system, then graduate.
The other underestimated factor is the value of keeping records. Write down your starting EC and pH, the date you planted, and the date you first harvested. After two crops, you will have a repeatable baseline that makes every subsequent grow faster and more predictable. That discipline, more than any equipment upgrade, is what separates growers who get consistent results from those who keep troubleshooting the same problems.
One Kratky jar on a windowsill is enough to learn everything that matters. Try it this season.
If you want to skip the sourcing and assembly stage, Sprout-lab’s compact modular hydroponic systems are pre-configured for exactly the crops on this list. The systems support up to 56 plants in a compact footprint, with built-in lighting options and reservoir sizing matched to leafy green growth cycles. That means no guessing about container opacity, pump sizing, or light height.

The practical difference for a beginner: you spend the first weekend growing, not troubleshooting a DIY build. Sprout-lab carries a 4.9/5 rating across more than 25,000 completed orders, and the product range includes passive hydroponic setups for growers who want the Kratky-style, no-pump experience in a purpose-built format. Browse the full system range and pick the footprint that fits your space.
Looseleaf lettuce, microgreens, basil, arugula, baby spinach, bok choy, and mint are the easiest hydroponic vegetables for beginners. They share low EC requirements (0.8–1.6 mS/cm), short harvest windows, and tolerance for modest indoor lighting.
The biggest drawbacks are the upfront cost of equipment, the need to monitor EC and pH regularly, and the risk of rapid crop loss if the water pump or air supply fails. Unlike soil, a hydroponic system has no buffer — problems show up fast.
Microgreens offer the fastest return on investment for home growers: they harvest in about one to three weeks, require minimal space and equipment, and command a high price per ounce at farmers markets and restaurants.
Root vegetables that need deep soil structure, like large carrots, potatoes, and sweet potatoes, are impractical in most home hydroponic setups. Corn and large squash are also poor fits due to their size, light demands, and root mass.