Free shipping for order over $50

Free shipping for order over $50
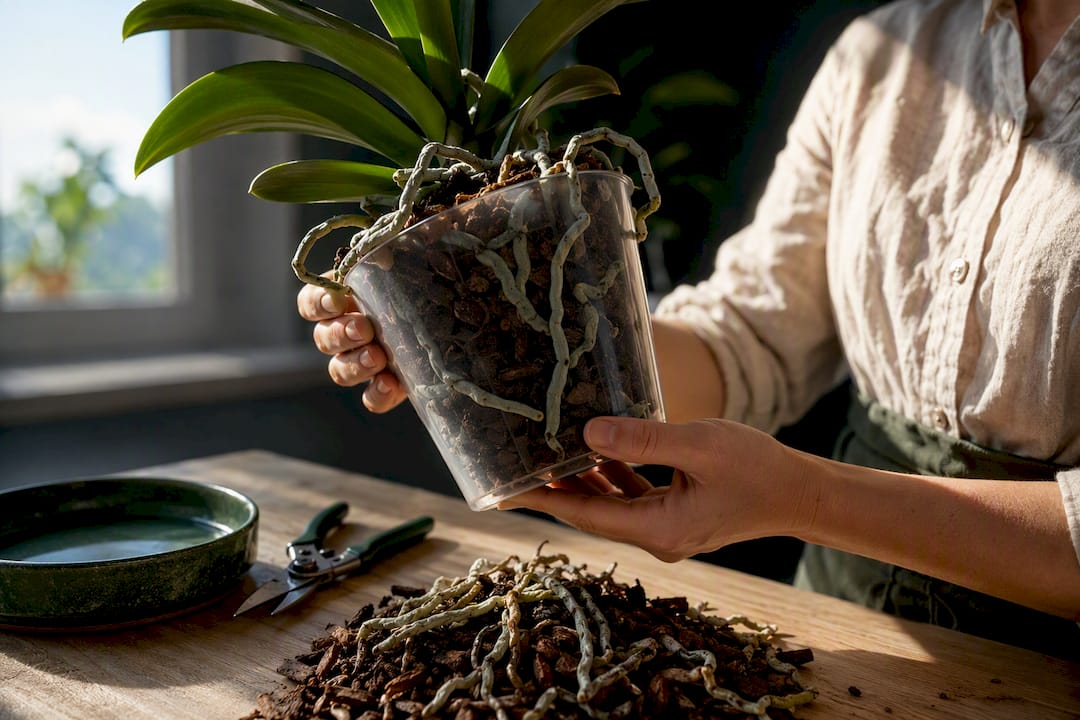
Repot now if you see mushy brown roots, a sour smell from decomposed bark, or roots climbing out of the pot in every direction. Those three signs override everything else, including bloom status. If your orchid’s roots are firm and green or silver, the medium still smells earthy, and the plant sits steady in its pot, wait until after flowering or until you spot new root tips. As a baseline, plan to refresh the medium every 1 to 2 years regardless, and check Sprout Lab’s bark mixes if you need fresh medium on hand.
TL;DR:
- Roots escaping the pot in large numbers and roots that are brown, hollow, or soft require immediate repotting to prevent further damage.
- Medium that holds excess water, smells sour, or has turned into mush indicates the need for repotting to avoid root rot.
- Checking plant stability, root color, and medium firmness can often reveal issues without removing the orchid from its pot.
- Repotting should occur every 1 to 2 years or when root or medium problems are visible, especially after flowering or at the appearance of new root tips.
- Use a matching medium based on watering habits and ensure tools are sterilized to avoid spreading pests or disease during repotting.
Three signals matter more than the rest, and if any one of them shows up, the decision is already made for you.
Roots escaping the pot in large numbers is the most visible tip-off. A few aerial roots reaching for humidity is normal orchid behavior. It’s a different story when most of the root mass has pushed out over the rim or wrapped itself around the outside of the container looking for somewhere else to go.
The potting medium tells you almost as much as the roots do. Bark that’s collapsed into fine, mud-like particles holds water long after it should have drained, and that trapped moisture is exactly what triggers rot in the first place. If you catch a sour or musty smell coming from the base of the pot, you’re smelling anaerobic decay in progress, not a normal part of the growing cycle.
Root color and texture confirm what your nose already suspects. Healthy orchid roots are firm, plump, and silvery green or bright green when wet. Roots that have gone brown, black, soft, or hollow are dead or dying tissue, and there’s no reviving them once they’ve collapsed.
A wobbly, top-heavy plant that lifts or tips in its pot usually means the root system has shrunk or rotted away and can no longer anchor the plant. And an orchid that’s stopped putting out new leaves or refuses to rebloom despite consistent light and water is often sitting in exhausted medium that can’t support new growth anymore.
Here’s the checklist to run through before you decide:
Pro Tip: If you can check off two or more of these at once, don’t wait for a “better” time. The plant is already telling you the current setup is working against it.
You don’t need to yank the plant out of its pot to get a good read on its condition. Start with three low-risk checks before you commit to anything more invasive.
Growing in a clear plastic pot makes this far easier over time, since you can watch root color and firmness through the sides without disturbing anything. If the checks above raise real concern, go ahead and unpot the plant. Gently work the rootball free, rinse off old bark under lukewarm water, and use sterile snips to remove any root that’s clearly brown, mushy, or hollow. Leave the healthy silver-green roots and the crown untouched, since cutting into living tissue near the base invites infection you didn’t have before.
Most orchids need fresh medium every 1 to 2 years as a maximum interval, not a fixed deadline. Bark breaks down on roughly that same timeline, according to the UConn Home Garden Education Office, losing the air pockets that keep orchid roots from suffocating. That said, visible signs of trouble always take priority over the calendar.
The ideal window is right after flowering, when the plant is heading into active growth and can put its energy into establishing new roots instead of holding blooms. Clemson HGIC points to a more precise marker: repot just as new root tips appear as small, rounded, lime green nubs. Catching that stage means the new roots settle into fresh medium almost immediately instead of adapting to a disruption mid-growth.
A few situations override the “wait until after bloom” rule entirely:
In any of those cases, repot immediately. Bud drop is a real risk when you disturb a blooming plant, but a rotting root system is a bigger threat than losing a few flowers.
Water the plant right after you repot it. This settles the new medium around the roots and closes up air gaps that would otherwise dry roots out unevenly. Let the water run through completely and don’t let the pot sit in standing runoff.
There’s one exception: if you made significant root cuts during the repot, hold off watering for a day or two. That gives the cut ends time to callus over, since watering fresh wounds invites the same rot you just removed.
Keep the plant out of direct, harsh sun and skip fertilizer until you see clear signs of new growth. A stressed root system can’t process nutrients well, and strong light adds heat stress on top of transplant shock. If the plant is top-heavy or unstable in its new pot, stake it or anchor it, and something like an Anti Spiral Plant Pot design helps keep root growth directed downward instead of circling the container wall.
There’s no single “best” orchid mix. The right choice depends on how often you actually water, and getting that match wrong is what causes half the root problems people blame on repotting itself.
If you tend to water heavily or your home runs humid, go coarser: chunky bark with extra perlite drains fast and lets roots breathe between waterings. If you’re a light, infrequent waterer, or your space runs dry, a mix that holds a bit more moisture prevents roots from drying out between sessions. This is the same logic behind the American Orchid Society’s advice that mix choice should track your watering habits, not the other way around.
A few practical steps make any new mix perform better:
Pro Tip: Repotting proactively before bark turns to sludge saves you from an emergency repot and root surgery later. If you’re not sure which texture fits your habits, Sprout Lab’s planting mediums come in bark-forward and moisture-retentive options built for exactly this kind of matching.
Sometimes the trigger for repotting isn’t age or watering habits. It’s an infestation or infection that’s taken hold in the medium itself. Mealybugs and scale often hide in the crevices of old bark or around the base of leaves, and a heavy infestation can weaken roots enough that repotting into clean medium becomes part of the treatment, not just routine maintenance.
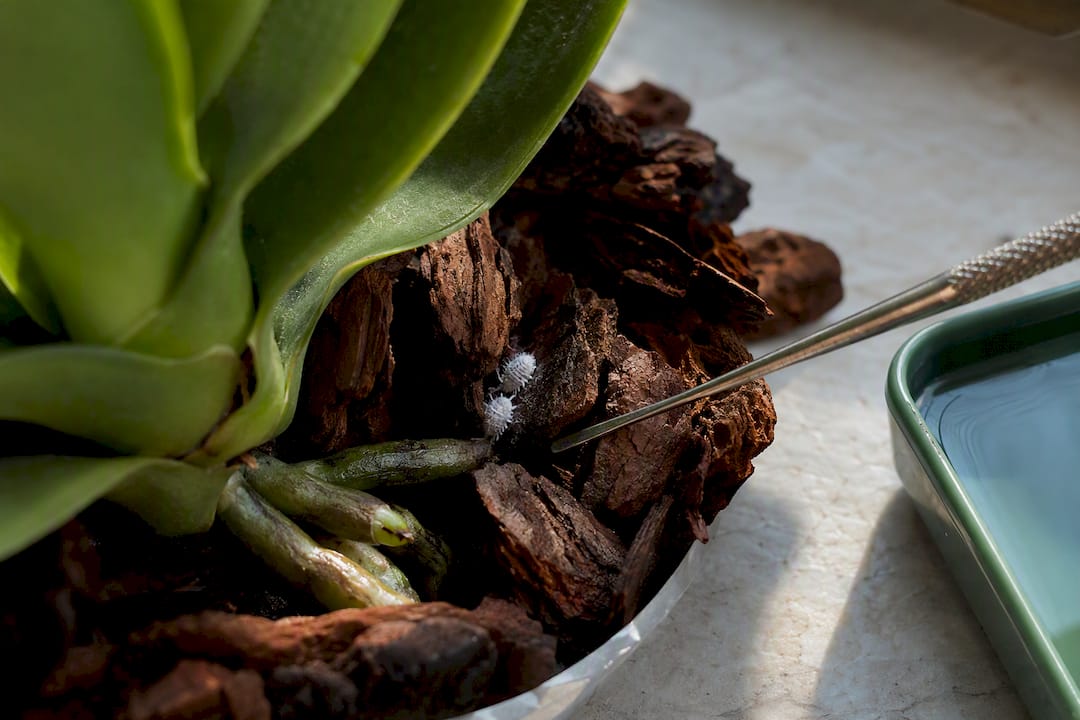
Root, crown, and stem rots are the more urgent version of this problem. These typically start from poorly drained medium combined with overwatering, and the American Orchid Society treats removing infected tissue and repotting into fresh mix as the standard corrective step, not an optional extra. Waiting on a repot when active rot is present usually makes the damage spread faster than the plant can recover from it.
Powdery mildew shows up less often on orchids than on other houseplants, but it can appear as a pale, dusty coating on leaves in stagnant, overly humid conditions with poor airflow. It’s more of a symptom of environment than of the potting medium, so improving air circulation solves it faster than a repot does. Still, if mildew shows up alongside soggy, broken-down bark, treat the two problems together rather than separately.
Any time you spot pests or disease during a routine check, that’s your cue to inspect the roots underneath. A plant that looks fine on top can still be sitting in medium that’s become a breeding ground for the very problem you’re trying to fix on the leaves.
Pot size shapes root health more than most growers expect. Orchids generally prefer being slightly snug in their containers, since a pot that’s too large holds excess medium that stays wet far longer than the roots can use, and that extra moisture is a direct path to rot.
A pot that’s become too small tells a different story. Roots pack in tightly, circle the inside wall, and eventually start pushing out over the rim and into open air because there’s nowhere left to grow inside the pot. At that point, sizing up isn’t optional. It’s one of the clearest repotting signs on this entire list.
Jumping too many sizes at once causes the same problem as an oversized pot from the start: too much medium, too much retained moisture, and a root system that can’t dry out between waterings. The safer move is going up just one size, giving the roots enough room to expand into fresh medium without drowning them in it. Growers dealing with heavier watering habits or naturally humid indoor spaces should pay close attention here, since drainage design in the container itself matters just as much as the mix you fill it with.
Smell it. Squeeze it. Check the roots. That’s the whole test, and it takes under a minute once you’ve done it a few times.
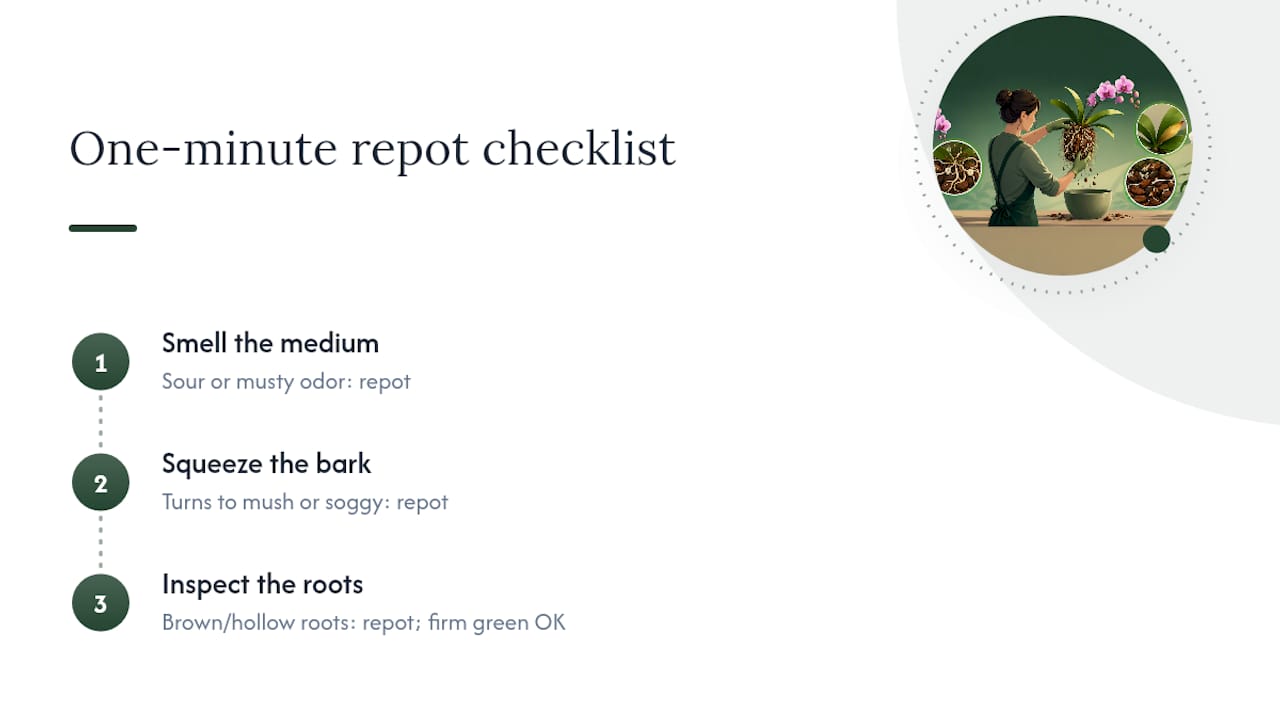
If the pot smells sour, the medium turns to mush in your fingers, or the roots underneath are brown and hollow, repot now. Don’t wait for a “better” weekend. The single biggest mistake I see home growers make isn’t repotting too often. It’s leaving collapsed, waterlogged bark in place for months because the plant hasn’t fully collapsed yet.
Sterilize your tools before you start, and jot down the repot date somewhere you’ll actually see it again. Future you will thank present you when it’s time to plan the next one.
— Irwin Lee
Once you’ve confirmed the signs and decided it’s time, the right supplies make the actual repot go a lot smoother. If your orchid is a heavy-watering habit plant or lives in a humid spot, a coarser bark-forward mix keeps roots from sitting wet. If you tend to water lightly, something with more moisture retention prevents the opposite problem.

Sprout Lab carries both ends of that spectrum. The soil mixes are built with the same bark, perlite, and charcoal ratios extension guides recommend, so you’re not guessing at proportions or hand-mixing components yourself. For plants that came out unstable or top-heavy after repotting, an Anti Spiral Plant Pot keeps new roots growing downward instead of circling the container wall, which sets up healthier growth for the next year or two before the cycle repeats. If you’re stocking up for this repot and the next one, browse the planting mediums category and pick the texture that actually matches how often you water, not the one that looks best on a shelf.
Look for roots escaping the pot, medium that’s turned to mush or smells sour, and roots that are brown or hollow instead of firm and green. Any one of these is a strong enough signal to repot without waiting for the next scheduled check.
The most common mistakes are repotting a plant in full bloom without an emergency reason, leaving decomposed bark in place too long, and cutting into healthy root tissue or the crown while trimming. Sterilize your tools and only remove roots that are clearly dead.
It usually looks unstable in the pot, has roots climbing out in several directions, and sits in bark that’s gone gray, soggy, or mushy instead of firm and springy. New leaves may also stall out even with consistent light and water.
Yes, watering right after repotting settles the new medium around the roots and closes air gaps. The one exception is after major root trimming, when waiting a day or two lets the cuts callus over before they get wet.
A keiki is a small plantlet that grows from a node on the flower spike or stem, complete with its own roots and leaves. Once a keiki has developed a few healthy roots of its own, you can separate it and pot it in fresh bark mix just as you would repot a mature plant.