Free shipping for order over $50

Free shipping for order over $50
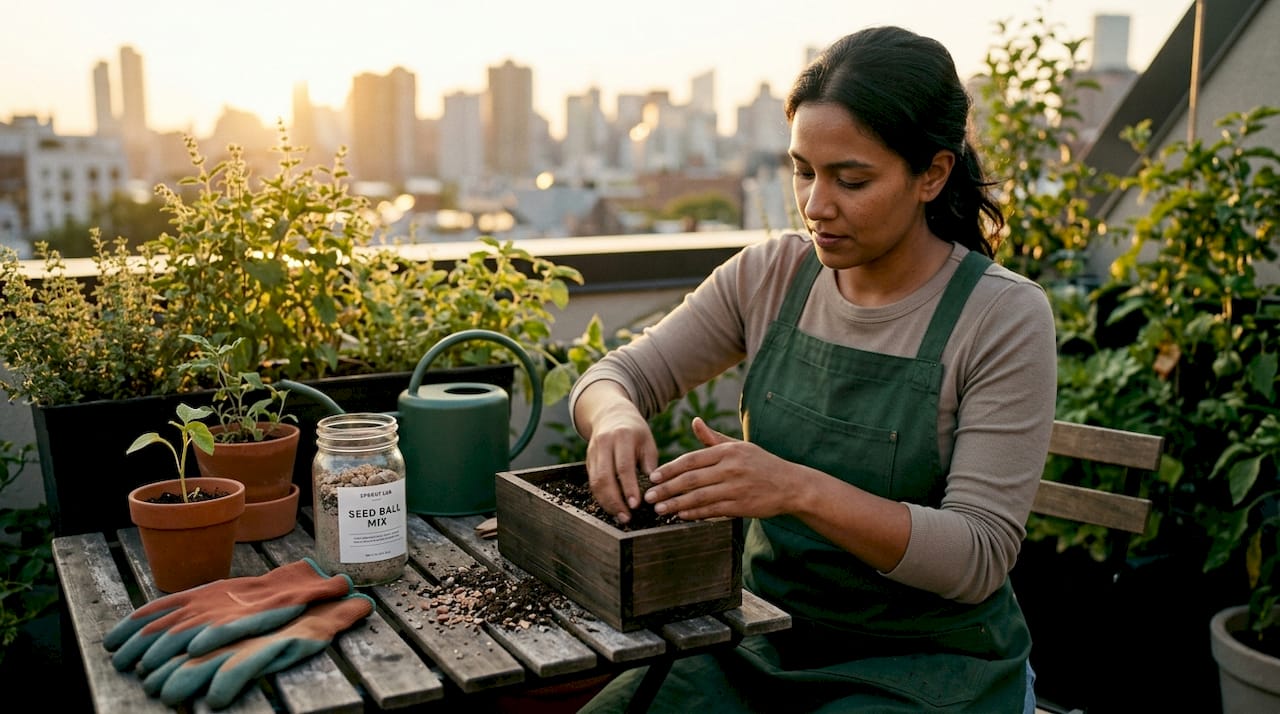
Seed balls are small spheres made of seeds embedded in clay and organic matter, designed to protect seeds until natural moisture triggers germination. You do not need a yard, a trowel, or any prior gardening experience to use them. Drop them on bare soil, a balcony planter, or a neglected patch of ground, and the clay shell does the rest. For urban dwellers who want to grow food or add wildflowers to tight spaces without digging up their lives, seed balls are one of the most practical starting points available.
A seed ball is a compact cluster of seeds bound inside a protective shell, typically made from clay, compost, and sometimes cow dung. The outer clay layer shields seeds from birds, insects, wind displacement, and drying out before conditions are right for growth. The compost packed inside acts as an immediate nutrient source the moment germination begins. This combination means seeds have everything they need to sprout without any help from you after placement.
The mechanism is straightforward. Rain or irrigation softens the clay shell over days or weeks. Moisture reaches the seeds, triggering germination. Because the seed ball sits on the soil surface rather than underground, light-dependent seeds get the exposure they need. Seed balls preserve soil microbes by eliminating digging, which is a genuine advantage over traditional sowing that disrupts fungal networks and beneficial bacteria living in the top few inches of soil.
Compared to scattering loose seeds by hand, seed balls offer measurably better protection. Loose seeds scattered on urban soil face predation rates that can wipe out most of a batch before germination. The clay coating changes that equation by making seeds less accessible and less visible to foragers.
Here is what a standard seed ball contains:
Pro Tip: Native seeds outperform exotic varieties in seed balls because they are already adapted to local rainfall patterns, soil chemistry, and seasonal temperature swings. Check with your local cooperative extension office or a native plant society for a regional seed list before you mix your first batch.
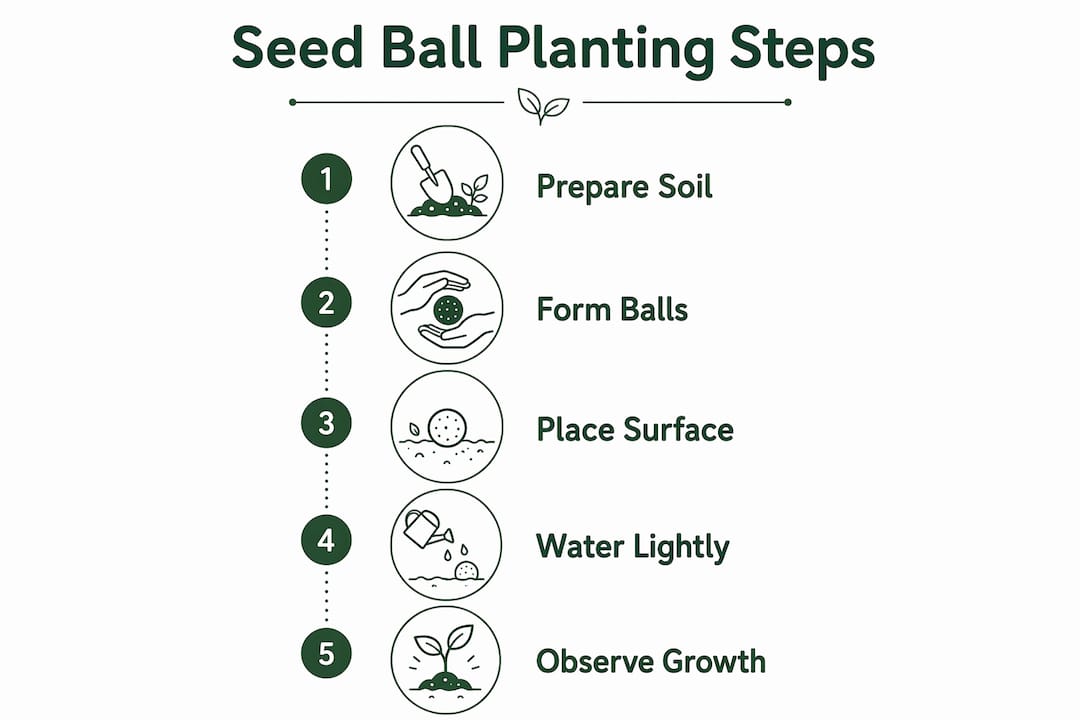
Making DIY seed balls at home takes about 30 minutes of active time and a few days of drying. The ingredient ratio matters more than most beginner guides admit. Too much water and the balls crack when drying. Too little and they crumble before you can place them.
Follow these steps for a reliable first batch:
The most common mistake is over-wetting the mixture. If your balls are cracking after drying, the mix was too wet. If they fall apart when you roll them, add a small amount of water and try again.
Pro Tip: Some seeds require scarification or cold stratification to break dormancy before they will germinate. Seed pretreatment by species significantly improves germination rates for hard-coated seeds like black-eyed Susan or wild lupine. Soak these seeds in warm water for 12 to 24 hours before mixing them into your clay blend.
For a deeper look at matching your compost blend to specific plant types, Sprout-lab’s guide on soil mix customization covers the ratios that work best for herbs and vegetables.
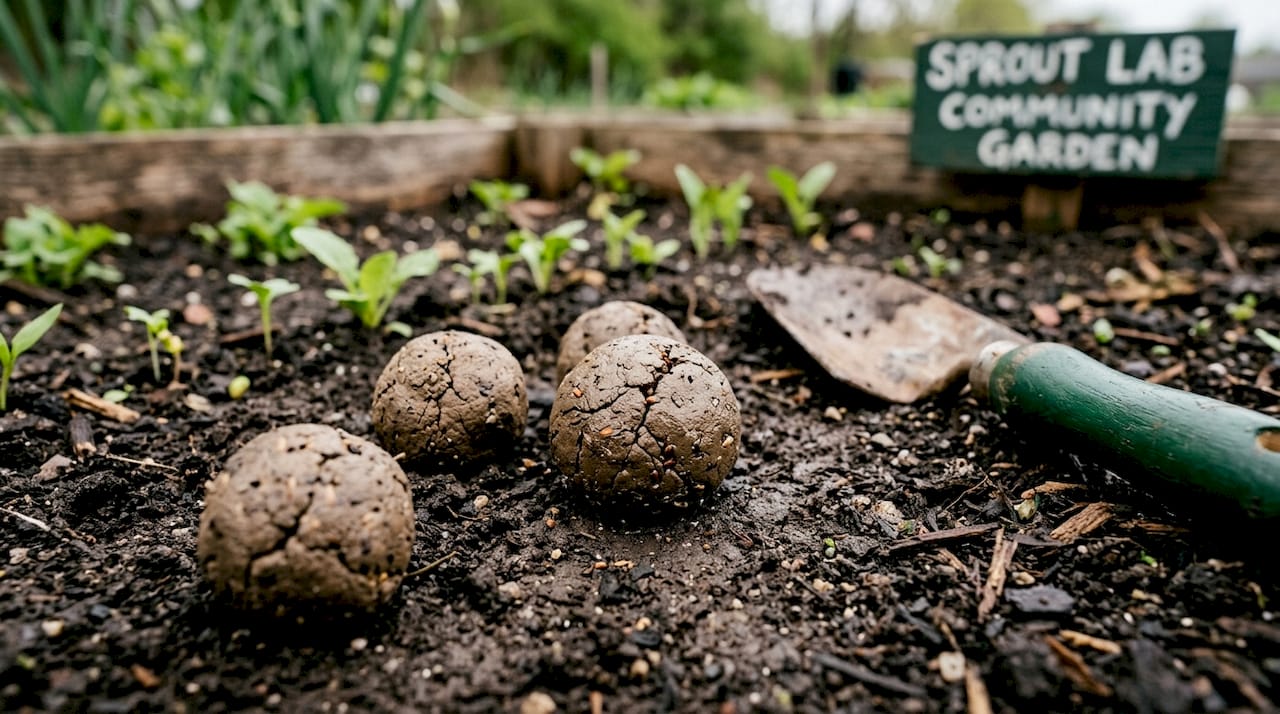
Placement is the one step where most beginners go wrong. The instinct is to push seed balls into the soil like a bulb. That instinct will cost you germination. Do not bury or break apart seed balls. Place them directly on the soil surface with firm contact but no coverage.
Here is what good placement looks like in practice:
Over-burying seed balls blocks light from reaching the seeds and is one of the leading causes of germination failure in urban settings. If you are working with a balcony or compact outdoor setup, Sprout-lab’s resource on growing in small spaces gives specific placement strategies for containers and raised beds.
Seed balls occupy a specific niche. They are not the fastest method, and they are not the most productive per square foot. But for low-effort, low-cost, no-dig gardening in urban spaces, they outperform most alternatives on accessibility.
| Method | Effort level | Soil disturbance | Best for | Limitations |
|---|---|---|---|---|
| Seed balls | Very low | None | Wildflowers, herbs, beginners | Slower germination for some species |
| Direct seeding | Low | Minimal | Vegetables, annuals | High predation, needs thinning |
| Container gardening | Medium | Low | Edibles, balconies | Requires ongoing watering and feeding |
| Hydroponics | Medium to high | None | Year-round food production | Higher upfront cost and setup time |
Hydroponics, as offered through Sprout-lab’s modular systems, is the strongest complement to seed ball gardening rather than a replacement. Seed balls work outdoors in soil. Hydroponics works indoors without soil at all. Together, they cover every growing scenario an urban dweller is likely to face across seasons.
The no-dig advantage of seed balls is worth emphasizing. Digging disrupts mycorrhizal fungi networks that help plants absorb water and nutrients. Seed balls facilitate no-dig gardening, which means the soil ecosystem stays intact and actually improves over time as plant roots establish and organic matter accumulates.
Seed balls do more than grow plants. In cities, where impervious surfaces and heat islands reduce biodiversity, a handful of wildflower seed balls placed in a neglected patch can establish a pollinator corridor within a single growing season.
“Using native and climate-adapted seeds increases germination and survival in urban and natural settings, making seed species matching one of the most impactful decisions a gardener can make.”
Native wildflower seed balls support bees, butterflies, and other pollinators that struggle to find food sources in dense urban environments. A single square meter of native wildflowers can support dozens of pollinator visits per day during peak bloom. That is a measurable ecological contribution from a 30-minute DIY project.
Beyond pollinators, seed balls reduce packaging waste compared to commercial seed packets, require no plastic trays or peat plugs, and need no fertilizer beyond what is already in the compost. For community gardening projects or guerrilla greening efforts in shared urban spaces, seed balls are the most logistically simple tool available. You can make 50 in an afternoon, carry them in a paper bag, and distribute them across a neighborhood without any tools or permits.
The carbon capture argument is real but modest at the individual scale. What matters more for most urban gardeners is the heat reduction effect. Planted ground surfaces absorb and release heat differently than bare concrete, and even small planted areas contribute to cooling microclimates around buildings.
For a focused look at wildflower varieties that perform best in urban seed ball projects, Sprout-lab’s eco-friendly garden guide covers species selection by region and season.
Seed balls work because they protect seeds, supply nutrients, and eliminate the need for digging, making them the most accessible entry point into sustainable urban gardening.
| Point | Details |
|---|---|
| Surface placement only | Never bury seed balls. Place them on soil with firm contact to allow light and moisture to reach seeds. |
| Drying is non-negotiable | Dry finished balls for several days in a ventilated, shaded area to prevent rot and premature sprouting. |
| Native seeds perform best | Match seed species to your local climate and ecology to maximize germination and long-term survival. |
| Spacing prevents failure | Use 20 balls per square meter outdoors; limit containers to 3 to 5 balls per 35 cm pot. |
| No-dig preserves soil health | Seed balls leave soil microbes and fungal networks intact, improving the growing environment over time. |
I spent two growing seasons convinced that urban gardening required systems. Grow lights, timers, pH meters, the works. Then I made my first batch of seed balls on a Sunday afternoon with red clay powder, a bag of compost, and a handful of California poppy seeds. I pressed them onto the edge of a raised bed I had been ignoring for months and forgot about them.
Three weeks later, I had sprouts. No watering schedule. No special soil prep. Just clay, compost, and rain.
What surprised me most was not the germination rate but the soil condition underneath those balls when I checked a month in. The ground was looser, darker, and visibly more alive than the surrounding area. The no-dig principle is not just a convenience. It is a genuinely better approach for soil that has been compacted or neglected, which describes most urban growing spaces.
The pitfall I see most often with beginners is impatience with drying time. People make beautiful seed balls, leave them out for a day, and then plant them while the core is still damp. The result is mold, not sprouts. Give them three full days minimum, even if the outside feels dry.
My honest recommendation: start with a wildflower mix suited to your region, make 20 balls, and place them in the most neglected corner of your outdoor space. You will learn more from that one batch than from reading another three guides.
— Luna
Seed balls work best when the compost and growing medium inside them are high quality. Sprout-lab’s organic soil mixes are peat-free, nutrient-rich, and formulated for exactly the kind of container and raised-bed gardening that pairs naturally with seed ball projects. Whether you are mixing your first batch of seed balls or setting up a balcony planter for edible herbs, the right soil foundation makes a measurable difference in germination speed and plant health. Sprout-lab also offers indoor gardening setups for urban dwellers who want to extend their growing season indoors while their outdoor seed balls establish through the cooler months.
Seed balls are made from powdered clay, compost or organic matter, and seeds, mixed with water and shaped into small spheres. Some formulations include cow dung for added microbial content, as used in large-scale afforestation programs.
Natural rainfall is sufficient in most climates, but light watering every two to three days works well during dry spells until the first sprouts appear. Avoid heavy watering that shifts the balls out of position.
Native and climate-adapted seeds consistently outperform exotic varieties because they are matched to local rainfall, soil, and seasonal conditions. Wildflowers, herbs like chamomile and borage, and compact vegetables like radishes are all strong choices for beginners.
Germination time varies by species and climate, but most wildflower seed balls show sprouts within two to four weeks of the first significant rainfall or consistent watering. Hard-coated seeds may take longer without pretreatment.
Yes. A 35 cm container holds 3 to 5 seed balls with adequate spacing to prevent overcrowding. Use a quality potting mix as your base and water lightly until germination begins. For tips on container seed starting, recycled containers work well as low-cost alternatives to commercial pots.