Free shipping for order over $50

Free shipping for order over $50
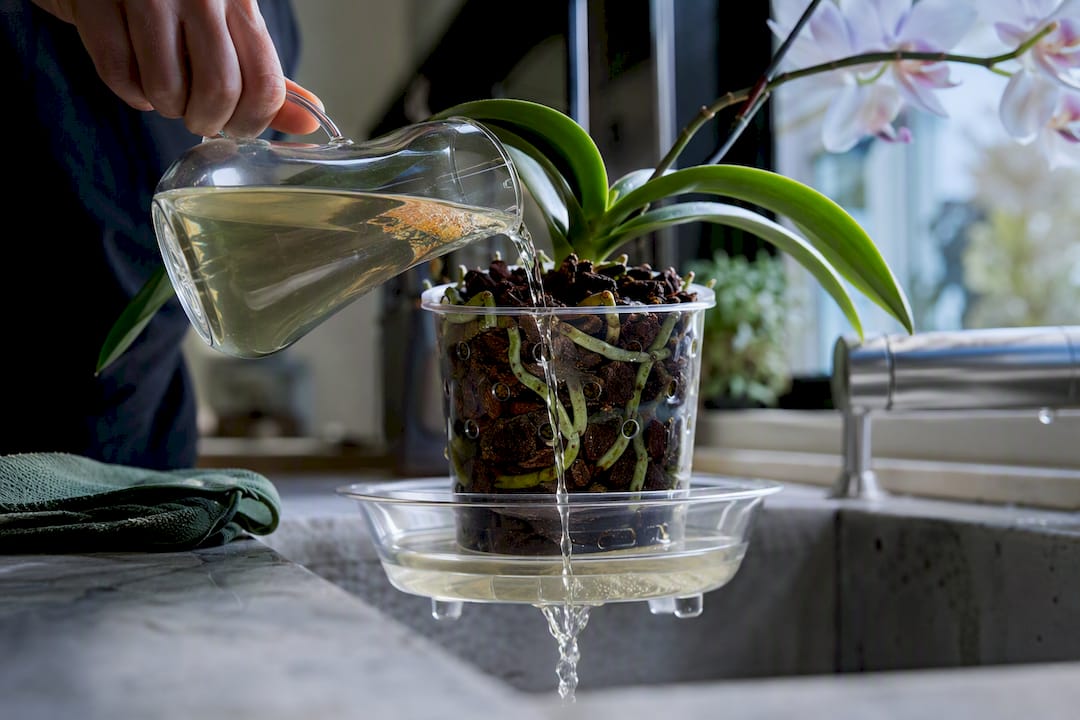
Feed indoor orchids weakly and frequently: a dilute strength, urea-free fertilizer with most waterings during active growth, flushed with plain water once a month to prevent salt buildup. Use nitrate-based formulas with calcium and magnesium rather than generic urea-heavy plant food. Cut back or pause in low light months, and switch to a phosphorus-heavier feed only briefly when you see a new spike forming.
TL;DR:
- Use nitrate-based, liquid fertilizers with calcium and magnesium, applying at quarter strength weekly and flushing with plain water once a month.
- Reduce feeding frequency and strength during winter or low-light months to prevent salt buildup and root damage.
- Water orchids thoroughly from the top after the medium has dried, avoiding salts accumulation and crown rot, and always empty excess water from trays promptly.
- Overfertilizing signs include brown leaf tips, crusty medium, and shriveled roots, which require thorough flushing or repotting with fresh media.
- Consistency in watering and feeding, along with notes on plant response, outweigh the need for a perfectly balanced fertilizer formula.
Orchids evolved clinging to tree bark in nutrient-poor rainforest canopies, catching whatever rain and decomposing leaf litter drips past their roots. That history matters more than most fertilizer labels admit. It’s why the American Orchid Society and most orchid specialists push growers toward steady, low-dose feeding instead of the occasional heavy dump of nutrients that houseplants tolerate fine.
The biggest label detail to check is nitrogen source. Generic fertilizers often lean on urea, which needs soil microbes to break it down into a usable form. Bark and moss don’t host that microbial community the way garden soil does, so urea can sit unconverted and go to waste, or worse, build up. Iowa State University Extension flags this directly: look for nitrate or ammoniacal nitrogen on the label instead.
Beyond nitrogen form, a few things separate an orchid-appropriate formula from a generic one:
Skip any fertilizer that only lists full-strength dosing on the label with no dilution guidance for epiphytic plants. If a bottle doesn’t mention orchids at all, treat its recommended dose as roughly four times too strong for what your plant actually needs.
The routine that works for most home growers is what the American Orchid Society calls “weakly weekly”: dilute the fertilizer well below label strength and apply it consistently instead of trying to find a perfect dose timing.
Here’s a practical breakdown you can actually follow without a spreadsheet:
A widely used shortcut among home growers, and one the Chicago Botanic Garden effectively echoes in its own care guidance, is three fertilized waterings followed by one flush. It’s simple enough to remember without a log, and it balances feeding against salt buildup automatically.
Heavy feeders like Vanda or Cymbidium can tolerate the stronger end of these ranges since they’re mounted or potted in fast-draining media that doesn’t hold salts as long. Moth orchids (Phalaenopsis) in bark, by contrast, do better staying toward the weaker end.
Pro Tip: Mark the diluted fertilizer for consistent dosing with a permanent marker. It removes the guesswork and keeps you from eyeballing a dose that’s stronger than intended.
Applying fertilizer to bone-dry bark or moss concentrates salts right where they contact the roots, which is one of the fastest ways to cause burn. Wet the medium first with plain water if it’s dried out, then follow with your diluted fertilizer solution once moisture has had a minute to spread through the pot.
A simple session looks like this:
A few habits make this routine more reliable over months rather than weeks:
That log matters more than it sounds. Orchids respond slowly, over weeks, not days, so without notes it’s easy to lose track of what actually caused a change.
Brown or blackened leaf tips, a white or crusty film on the medium surface, and roots that look shriveled or dead instead of plump and green are the clearest signals you’ve been feeding too heavily. Orchid roots double as the plant’s main gas exchange organs, so salt damage there does more harm, faster, than leaf symptoms suggest.
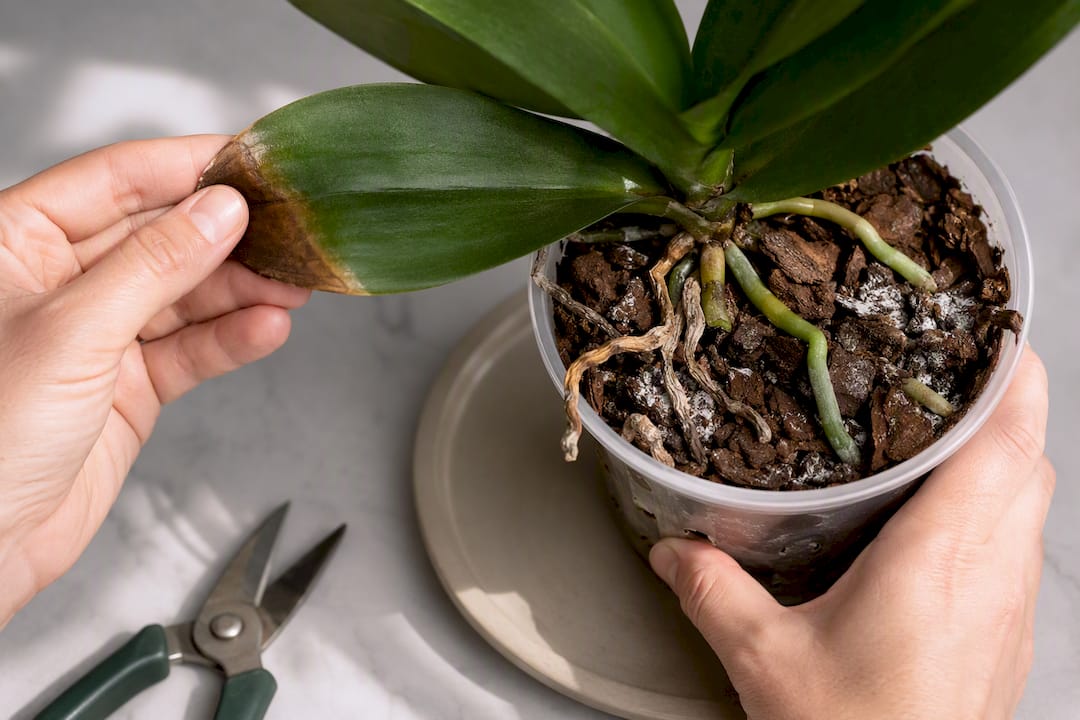
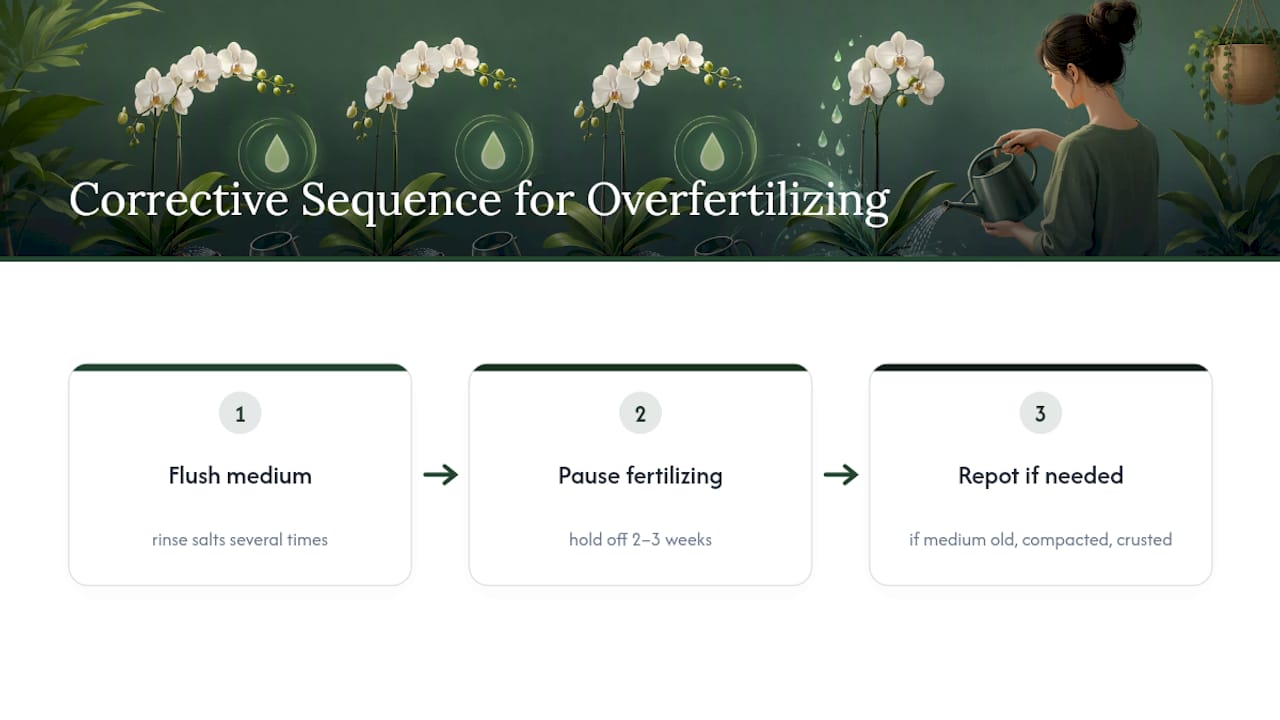
The fix starts with a thorough flush: run plain water through the pot several times to rinse dissolved salts out of the medium, then hold off fertilizing for two to three weeks. If the medium is old, compacted, or visibly crusted, repotting into fresh bark or moss removes the problem instead of just diluting it.
Water quality plays a bigger role here than most growers assume. Growers generally consider tap water under 525 ppm total dissolved solids tolerable for orchids, while very low total dissolved solids water approximates rainwater level and needs almost no adjustment. If your tap water tests high, switching to reverse osmosis or distilled water and supplementing calcium and magnesium separately, as recommended in Chicago Botanic Garden’s care guidance, solves buildup problems that fertilizer dilution alone can’t fix.
One more common misdiagnosis: a healthy-looking orchid that simply won’t rebloom is usually a light problem, not a feeding problem. Check leaf color and shadow strength against Sprout-lab’s guide to indoor light requirements before adding more fertilizer to a plant that’s actually starved for light.
Urban growers don’t need an elaborate feeding calendar. A quarter-strength dose on a weekly rhythm, paired with a monthly plain-water flush, covers the vast majority of home setups without extra math or gadgets.
For compact or automated systems, consistency matters more than precision. A few things that hold up well in tight apartment setups:
A plant care expert points to Plant GROW as a fit for exactly this pattern: it’s urea-free, includes micronutrients, and forgives the occasional missed week better than a stronger synthetic blend would.
Beginners tend to obsess over finding the “right” fertilizer, but light, watering habits, and potting medium usually matter more than which bottle sits under your sink. A weakly weekly routine at quarter strength is forgiving enough to survive a busy month, and that forgiveness is worth more than a perfectly calculated NPK ratio you can’t stick to.
Start there, take notes, and adjust slowly. Your specific apartment, light, and water will always beat generic advice once you’ve watched a plant respond to it for a season.
— Luna
Getting the dilution and timing right is easier when you’re not guessing at a workbench with a teaspoon and a calculator. Sprout Lab’s Plant GROW liquid fertilizer is urea-free and micronutrient-inclusive, built to work with the weakly weekly method described above without the risk of over-concentrating a dose.

If you want the exact schedule laid out for you, the orchid feeding schedule guide breaks down quarter-teaspoon dosing for bark and moss setups step by step. And if you’re running a compact or automated indoor garden alongside your orchids, Sprout Lab’s soil mixes and planting mediums are worth checking for the rest of your plant collection. Grab a bottle of Plant GROW, start at quarter strength this week, and see how your roots and new growth respond over the next month.
A liquid, water-soluble fertilizer with nitrate rather than urea nitrogen, ideally with added calcium and magnesium, works best for most indoor orchids grown in bark or moss.
Water from the top so the solution flows down through the roots and drains freely out the bottom, rather than soaking from below, which can leave salts and moisture trapped near the crown.
Generic all-purpose fertilizers often contain urea nitrogen that bark media can’t process well, so it’s better to choose a formula labeled for orchids with nitrate nitrogen, even if that means diluting a general fertilizer far below its printed strength.
Switch to a higher-phosphorus fertilizer for two or three feedings once you see a new spike forming, but remember that insufficient light is the more common reason orchids fail to bloom in the first place.