Free shipping for order over $50

Free shipping for order over $50
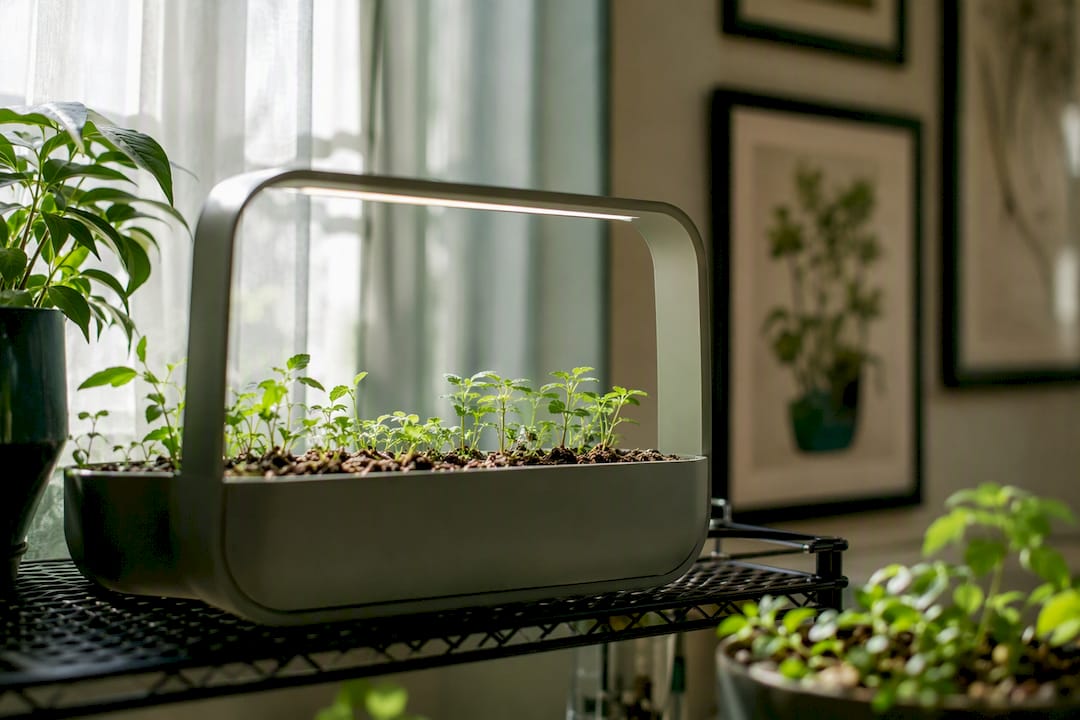
A grow pod is a small, self-contained planting unit that holds a seed or seedling inside a growing medium, usually paired with a water reservoir and grow light so the plant gets everything it needs in one compact package. Instead of soil in a tray, the pod combines a medium like coco coir, sponge, or rockwool with a wicking or reservoir connection that keeps roots consistently moist. Most consumer pods snap into a base unit with a timer-controlled LED light overhead.
People reach for grow pods to raise herbs, salad greens, microgreens, and small vegetables on a countertop or windowsill, no yard required. The idea isn’t new: the University of Oregon ran a shipping-container “Grow Pod” from 2018 to 2023 as a controlled-environment agriculture project, proving the same pod principles that work on a kitchen counter can scale to institutional food production. Sprout-lab builds on that same logic at home scale, with a modular hydroponic system.
A grow pod combines a growing medium, a water or nutrient delivery system, and usually a light source into one compact unit built for fast, low-mess indoor growing.
| Point | Details |
|---|---|
| Core definition | A grow pod houses a seed in a growing medium connected to water and nutrients, often with an integrated light. |
| Delivery mechanisms vary | Pods use wicking, passive reservoir contact, active pumps, or misting to feed roots. |
| Best starter crops | Basil, mint, lettuce, kale, and microgreens germinate reliably and tolerate small root zones. |
| Replace pods on schedule | Swap pre-seeded pods once growth visibly slows, typically after 6 to 8 weeks of active growth. |
| Scale with Sprout-lab | Sprout-lab’s modular hydroponic system applies the same pod principles to support up to 56 plants in one compact setup. |
Every grow pod is built from a handful of parts that work together, and once you can name them, you can troubleshoot almost anything that goes wrong. At the center is the pod or cartridge itself: a small vessel, often plastic or a biodegradable casing, that holds the seed and its growing medium in place.
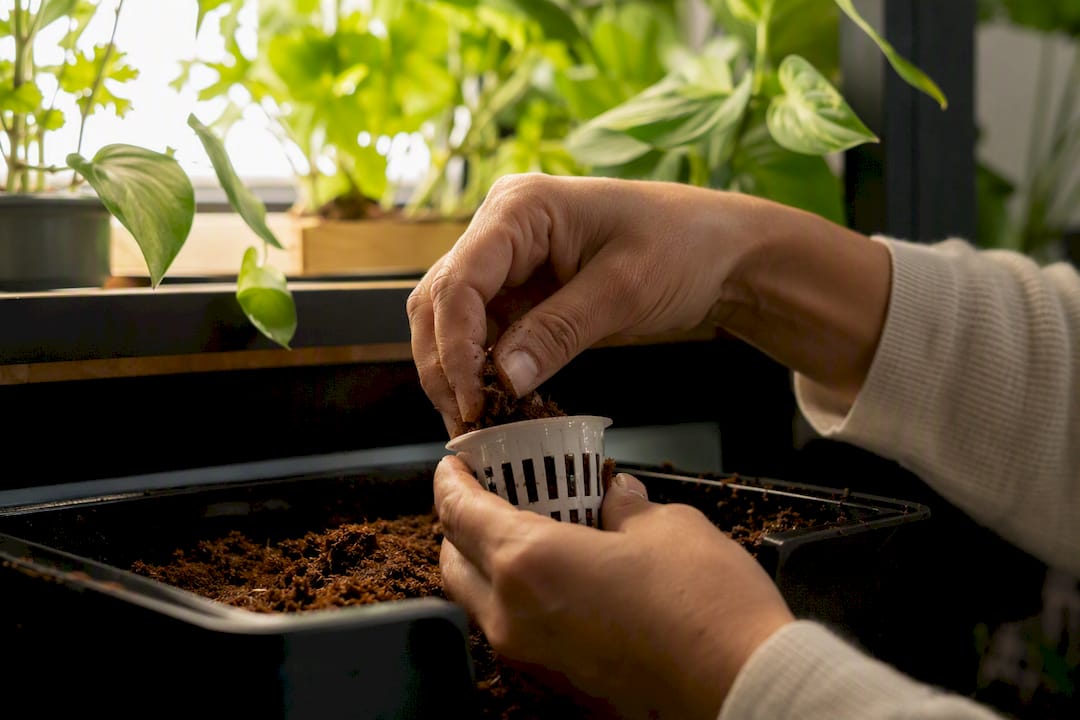
Inside that cartridge sits the growing medium. This is the material that anchors the roots and holds moisture, and it varies by product. Coco coir is common because it’s pH neutral to slightly acidic and retains water while still allowing airflow to the roots, which is why so many pod manufacturers use it instead of peat or plain sponge. Rockwool and foam sponges show up often too, especially in pre-seeded starter kits.
Beyond the pod itself, a full grow pod system usually includes:
The pod and medium are the parts you’ll replace most often. The reservoir, light, and cradle are typically the durable, reusable components you keep for years, which is part of why grow pod systems tend to cost less over time than replacing an entire soil-based setup every season.
Grow pods feed roots through one of three basic mechanisms: capillary wicking, passive reservoir contact, or active pump delivery. Each does the same job differently, and knowing which one your pod uses tells you exactly how to troubleshoot it.
Hydroponic systems in general work by suspending plants in a nutrient-rich water solution instead of soil, so roots pull in food and moisture directly rather than filtering it through dirt. That direct delivery is a big part of why pod-grown plants often establish faster than seeds started in trays.
Nutrients matter as much as water. Most pod systems use a liquid nutrient concentrate added to the reservoir on a set schedule, supplying the nitrogen, phosphorus, and potassium a plant would normally pull from soil. pH matters here too: most leafy greens and herbs prefer a slightly acidic range, and coco coir’s naturally neutral-to-acidic profile is one reason it’s a popular pod medium. You don’t need to obsess over exact numbers as a beginner, but if a plant stalls despite good light and water, pH drift is often the hidden culprit.
Light does the rest of the work. Most indoor plants need somewhere between 12 and 16 hours of light a day to photosynthesize properly, which is why nearly every pod system ships with an integrated LED and a timer rather than relying on a windowsill. Automating that schedule removes the single biggest variable in indoor growing: forgetting to turn the light on.
Pro Tip: If your pod feels waterlogged and roots look brown or mushy, cut back on watering frequency rather than volume. Roots need oxygen as much as moisture, and a reservoir that never lets the medium dry out even slightly is a common cause of root rot in beginner setups.
Grow pods generally fall into a few categories, and picking the right one comes down to how much control you want versus how little you want to think about.
Pre-seeded cartridges arrive with the seed already embedded in the medium. You drop them in, add water, and wait. These are the easiest entry point for total beginners because there’s no guesswork about spacing or seed depth, though your plant choices are limited to whatever the manufacturer stocks.
Seedless “grow-anything” pods are empty vessels you fill with your own seeds and medium. They cost less over time and let you grow whatever you want, from heirloom basil to a specific pepper variety, but they demand a bit more know-how around seed depth and germination conditions.
Refillable pods sit in the middle: reusable cartridges designed to be emptied, cleaned, and reseeded, which cuts down on plastic waste compared with fully disposable pre-seeded versions.
Growing medium is another axis worth knowing:
Automation level is the final variable. Manual systems ask you to check water levels and turn lights on yourself. Timed or automated systems, which most buying guides now treat as a standard comparison point alongside pod type and medium, handle the light schedule and sometimes the watering cadence without your input. If you travel often or simply forget things, automation earns its keep fast.
Grow pods solve a specific problem well: growing a handful of plants indoors without soil mess, guesswork, or a green thumb. They don’t replace a backyard garden, and knowing where the line sits saves you from disappointment.
The upside is real and specific:
The limitations matter just as much:
If you want a windowsill’s worth of fresh basil and lettuce with minimal fuss, a pod system is close to the right tool. If you’re trying to feed a household, you’ll want a larger reservoir-based hydroponic setup or raised beds instead.
Short-cycle, shallow-rooted plants are the sweet spot for grow pods. Culinary herbs like basil, mint, and cilantro consistently do well, and consumer guides routinely list them among the best first crops because they tolerate a small root volume and reward you with usable leaves within weeks. Salad greens, kale, and microgreens follow close behind for the same reason: fast turnaround, forgiving roots.
Dwarf tomato varieties and small pepper plants can work in larger pods, but they need more headroom and often a support stake as they mature, so check the pod’s rated size before committing.
Avoid long-rooting crops like carrots or parsnips, and skip large vining plants such as cucumbers or full-size tomatoes unless your system includes a trellis and a bigger pod designed for that root mass.
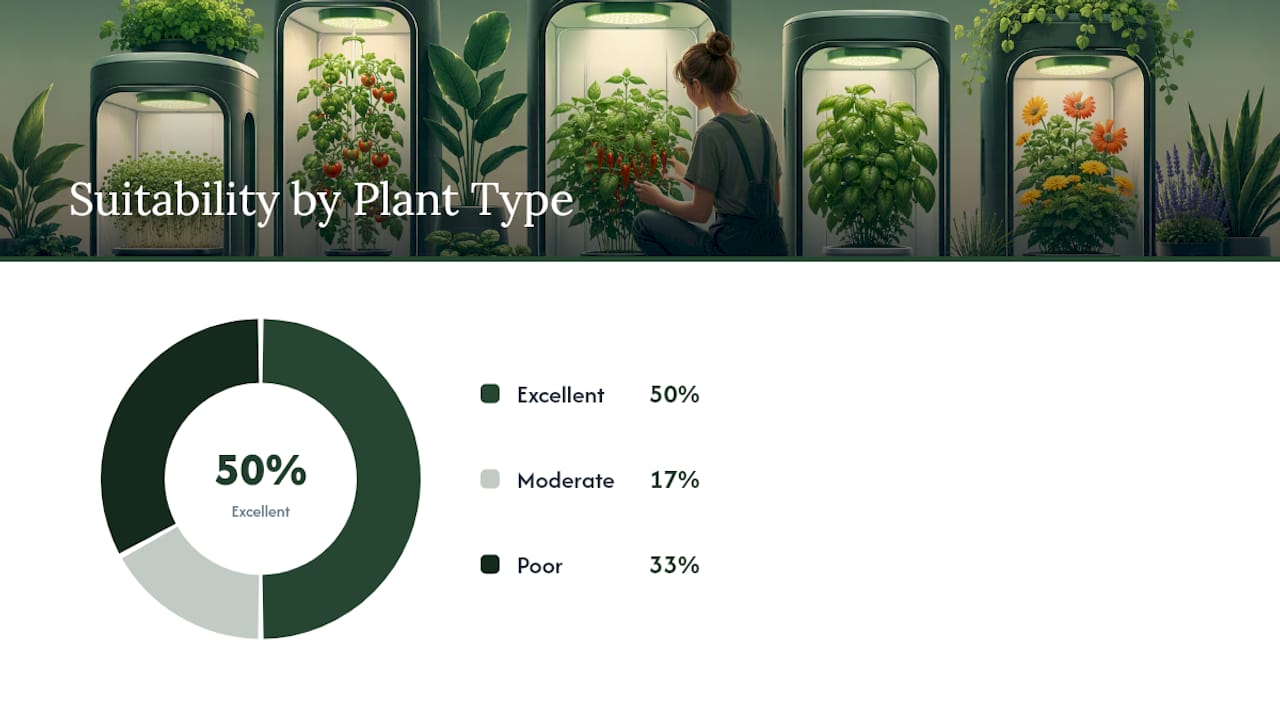
| Plant Type | Suitability | Notes |
|---|---|---|
| Culinary herbs (basil, mint) | Excellent | Fast growth, shallow roots, standard pod size works fine |
| Salad greens and kale | Excellent | Quick harvest cycle, tolerates most pod media |
| Microgreens | Excellent | Ready in days, needs minimal root depth |
| Dwarf tomatoes, small peppers | Moderate | Needs larger pod and often a stake or support |
| Carrots, root vegetables | Poor | Requires deep, undisturbed root space pods can’t provide |
| Large vining plants (cucumbers) | Poor | Needs trellis and root volume beyond standard pods |
Setting up a grow pod system takes less time than assembling most furniture, and the routine maintenance afterward is measured in minutes a week, not hours.
Initial setup:
Week-by-week expectations for the first 6 to 8 weeks:
Routine maintenance breaks down into four simple habits: refresh nutrients on the schedule your product recommends (usually every 1 to 2 weeks), top off or fully change the reservoir water every couple of weeks to avoid stagnation, check that the light timer hasn’t reset after a power blip, and replace pods once growth visibly slows or roots have exhausted the medium.
Pro Tip: If you don’t own a pH or EC meter, use a simple rule of thumb instead: change your reservoir water completely every two weeks regardless of how it looks, and only add new nutrient concentrate to fresh water, never on top of old solution. This single habit prevents most of the nutrient buildup issues that trip up beginners who skip the meters entirely.
Most grow pod failures trace back to one of three things: too much water, not enough oxygen, or a nutrient imbalance. None of them require throwing out the whole setup.
Slow or absent germination is usually a temperature or moisture issue. Fuzzy white growth on the medium’s surface is mold, almost always from overwatering combined with poor airflow. Yellowing or browning leaf tips point to nutrient burn, meaning the concentrate is too strong for the plant’s current stage. Mushy, dark roots signal root rot from a waterlogged medium starved of oxygen.
| Symptom | Likely Cause | Quick Fix |
|---|---|---|
| Slow or no germination | Temperature too low or medium too dry | Move to a warmer spot (65 to 75°F) and check moisture daily |
| White fuzzy growth on medium | Mold from overwatering or poor airflow | Reduce watering, increase air circulation near the pod |
| Yellow or browning leaf tips | Nutrient burn from over-concentrated solution | Dilute nutrient mix and flush reservoir with plain water |
| Mushy or dark roots | Root rot from waterlogged, low-oxygen medium | Let medium dry slightly between waterings, check pump function |
Catch these early and a single adjustment usually solves it. Left alone, mold and root rot can spread to neighboring pods sharing the same reservoir, so isolate an affected pod if you’re running a multi-pod tray.
Sprout-lab’s modular hydroponic system takes the same components covered above, the reservoir, the growing medium, the pod cradle, and the automated light schedule, and scales them into a single home setup capable of supporting up to 56 plants in a compact footprint. Instead of managing a handful of scattered single pods, you get one integrated system where the reservoir feeds every plant cradle and the lighting runs on a shared, programmable timer.
That matters most for people who tried a basic pod kit, liked the results, and wanted more capacity without switching to a full greenhouse or DIY reservoir build. The modular design keeps the beginner-friendly parts of a grow pod, no soil, no guesswork on watering, while removing the ceiling on how much you can grow at once.
What that setup delivers in practice:
If you’re brand new to indoor growing, start with pods. They forgive mistakes, need minimal daily attention, and get you a working harvest of herbs or greens in weeks, not months of trial and error with soil trays.
DIY reservoir systems and larger hydroponic setups make more sense once you know you want volume, whether that’s feeding a household or running a hobby that’s outgrown a windowsill. They demand more upfront learning around pH, EC, and reservoir sizing, and they cost more in time even when they don’t cost more in dollars.
Most beginners I’ve seen get frustrated not because pods failed them, but because they expected pod-scale output from a countertop system. Start small, get the rhythm of watering and light schedules down, then decide if you actually need more plants or just wanted the confidence that you could grow something successfully first.
Sprout-lab is the practical next step for anyone who read this far and realized a single starter pod won’t be enough for long. Where a basic pod kit tops out at one or two plants, Sprout-lab’s modular hydroponic system fits up to 56 plants into the same kind of compact footprint, with the reservoir, lighting, and scheduling already built to work together instead of managed pod by pod.

That means less time babysitting individual water levels and more time actually harvesting. Sprout-lab also carries soil mixes formulated for specific plant needs, in case you’re pairing hydroponic pods with potted plants elsewhere in your home. If the components and setup steps covered above made sense to you, the logical move is to see the automated hydroponic setup options built around exactly this system and pick the configuration that matches your space.
For readers who want to go deeper on the mechanics or history behind grow pods, these resources cover the ground this article draws from:
A pre-seeded pod typically lasts one full growth cycle, roughly 6 to 8 weeks for herbs and greens, before it needs replacing due to reduced medium capacity and slowing yields.
Most manufacturers recommend one to three seeds per pod, then thinning down to the single strongest seedling once true leaves appear to avoid overcrowded roots.
Yes, seedless or refillable pods are designed to accept regular seeds of your choosing, while pre-seeded cartridges only offer whatever variety the manufacturer packed inside.
A typical plant pod is a small cylindrical or basket-shaped cartridge, usually an inch or two across, holding a spongy or fibrous growing medium around the seed with a mesh or perforated shell that lets roots reach water below.
A grow pod is a component within a hydroponic system rather than a synonym for it. The pod holds the seed and medium, while hydroponics describes the broader method of delivering nutrients through water instead of soil.