Free shipping for order over $50

Free shipping for order over $50

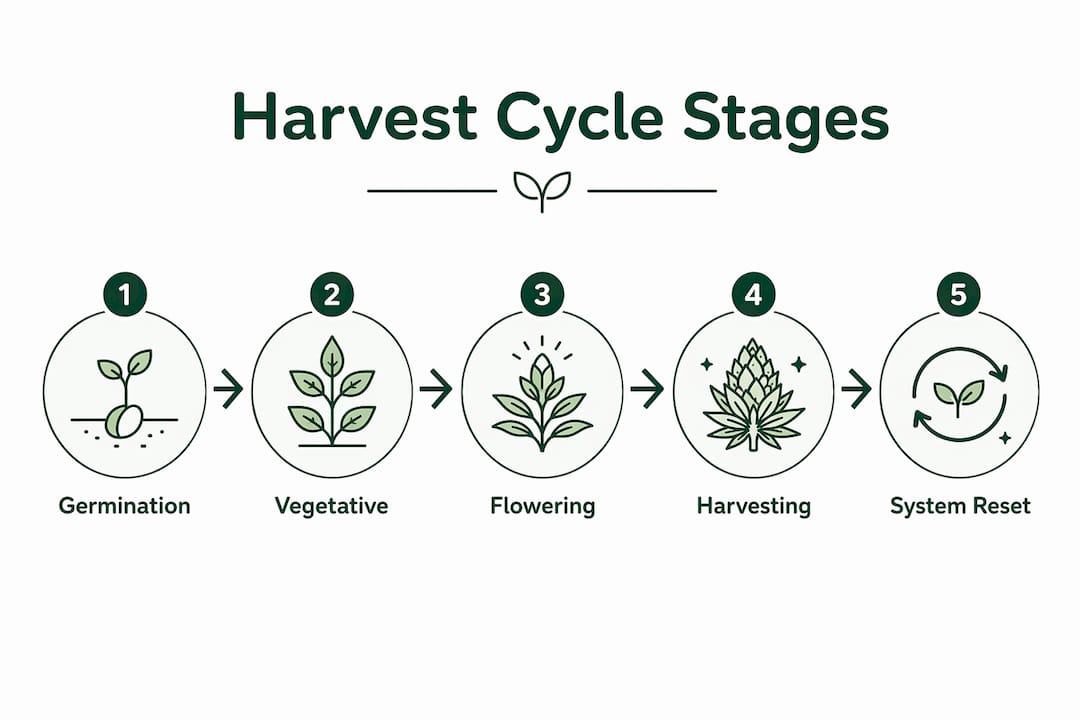
A harvest cycle is the repeatable sequence of plant development stages, matched with the operations you run inside your hydroponic system, from the moment a seed germinates to the moment you store your produce and reset the growing slot. Get it right and you get predictable yields, better flavor, and far less wasted nutrient solution. Get it wrong and you end up harvesting too early, overfeeding at the wrong stage, or watching a week’s worth of basil wilt in the fridge.
The core elements of every hydroponic harvest cycle:
The agricultural cycle is an ordered sequence of crop-production stages that applies just as cleanly to a countertop hydroponic unit as it does to a field. Here is what each stage demands from you:
Pro Tip: Don’t rely on a wall calendar alone. Log your daily mean temperature and calculate growing degree days (GDD) by subtracting the crop’s base temperature from the daily average. Indoors, where you control temperature, this gives you a far more accurate harvest forecast than “week 6.”
Timelines vary more than most beginner guides admit. Thermal time governs internal plant development, so a room running at 75°F will push crops faster than one at 65°F, even with identical lighting.
| Crop | Germination | Vegetative | Harvest Window | Full Cycle |
|---|---|---|---|---|
| Microgreens | Very short | About one to two weeks | Mid-cycle | 1 to 2 weeks |
| Lettuce | Several days | Several weeks | Several weeks | Several weeks |
| Herbs (basil, cilantro) | Several days | Several weeks | Several weeks | Several weeks |
| Cherry tomatoes | Several days | Several weeks | Several weeks | Several weeks |
Staggered planting is the practical answer to the “feast or famine” problem in small systems. Plant a new slot every 1–2 weeks so harvests overlap instead of all arriving at once. For a 4–8 week crop like lettuce, starting four slots two weeks apart gives you a rolling harvest every two weeks rather than four heads on the same Tuesday.
Pro Tip: Use small urban spaces more efficiently by checking out tips for growing plants in small spaces before you finalize your planting schedule.
Calendar dates are a starting point, not a verdict. Use these checks instead:
Physiological maturity (maximum dry weight) differs from harvest maturity (best flavor and storage life). Picking before harvest maturity gives you underdeveloped flavor; waiting past physiological maturity degrades quality and increases pest risk. For most home hydroponic crops, harvest maturity is the target.
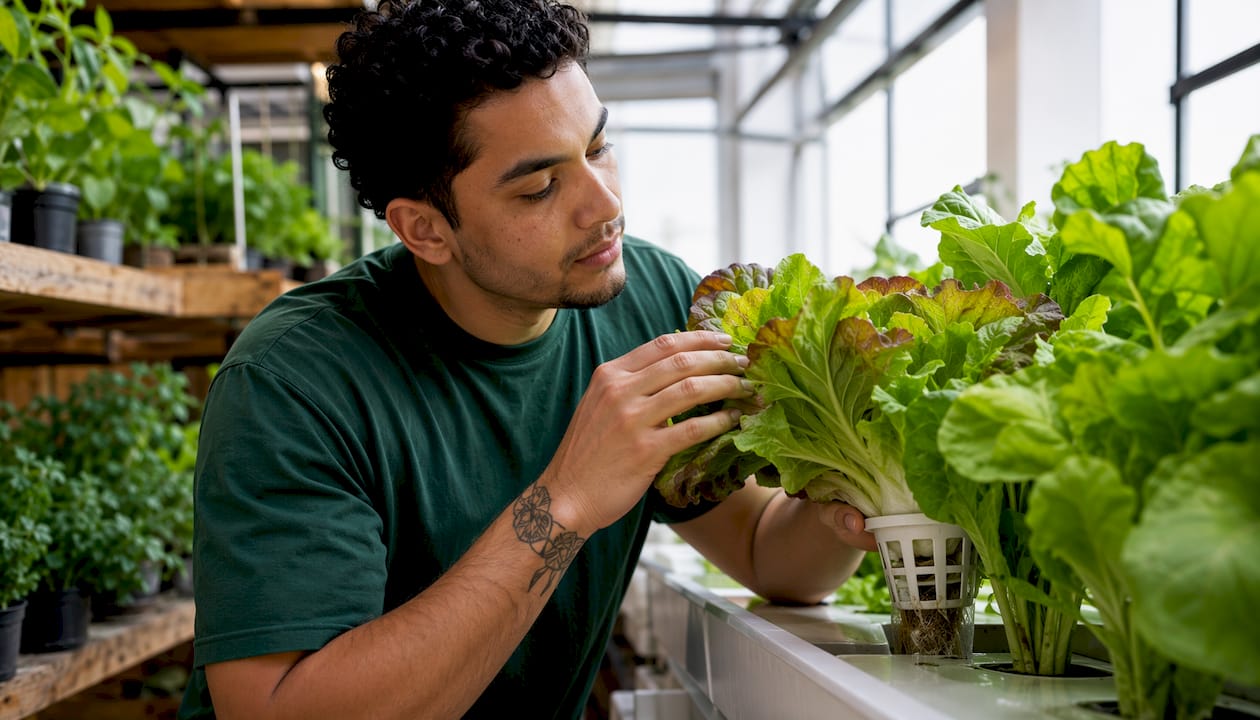
A clean, organized harvest takes 20 minutes and saves you from wilted produce by Thursday.
Harvest-day checklist:
Post-harvest handling:
| Crop | Storage Conditions | Method | Typical Shelf Life |
|---|---|---|---|
| Microgreens | Cool, around refrigerator temperatures | Sealed container, dry | A few days |
| Lettuce | Cool storage | Sealed bag with paper towel | About a week to slightly more |
| Herbs | Cool or in water | Loosely wrapped or upright in jar | About a week to two weeks |
| Cherry tomatoes | Room temperature | Open container | Several days |
Safety note: After every harvest, sanitize reusable hydroponic components (net pots, channels, reservoir) with a dilute hydrogen peroxide solution before replanting. Skipping this step is the fastest way to introduce root rot into your next cycle.
Treating the harvest cycle as an economic period, tracking what goes in against what comes out, helps you decide whether to scale up or focus on higher-value crops. Input costs, labor demands, and timing all affect whether a cycle is worth repeating at the same scale.
A simple calculation: a lettuce cycle might involve minimal input costs per plant slot and can yield several heads with retail value exceeding those costs, making the return per slot meaningful. Tomatoes cost more in inputs and time but yield higher per-plant value.
Tactics that cut waste without cutting corners:
Pro Tip: Monitor EC daily in the final week before harvest. A rising EC without added nutrients means the plant is drinking water faster than nutrients, a sign it is approaching peak maturity. Drop EC slightly and flush with plain water 24–48 hours before cutting for cleaner flavor.
| Problem | Likely Cause | Fix |
|---|---|---|
| Bitter lettuce | Bolting from heat or delayed harvest | Harvest earlier; keep temps below 75°F |
| Weak flavor in herbs | Harvested too late or after flowering | Cut before flower buds open |
| Root rot between cycles | Skipped sanitization | Full reservoir drain and H₂O₂ rinse |
| Nutrient burn near harvest | EC too high in final week | Flush with plain water 48 hours before cut |
| Uneven harvests | All plants started same day | Stagger planting by 1–2 weeks per slot |
The most common mistake is calendar-only timing: planting on a Monday and expecting to harvest exactly 35 days later regardless of what the plant looks like. Use the visual and taste checks above, and let the plant tell you when it is ready.
Modular slot-based systems let you assign different photoperiods or nutrient profiles to adjacent slots, which means you can run lettuce in weeks 1–4 in one slot while the next slot is in week 2, and the one after that is just germinating. That operational separation is what makes continuous harvesting feasible in a small footprint.
A practical plan for a 12-slot system:
Sprout-lab’s compact systems are designed specifically for this kind of staggered workflow. The modular layout means you can scale from a single crop to a full mixed-herb-and-greens rotation without needing more floor space. Growers using Sprout-lab setups have reported rapid germination and consistent plant health across cycles, which is exactly what you need when you are running overlapping harvests in a studio apartment.
Sprout-lab’s systems support up to 56 plants in a compact area, and the slot-based design makes it straightforward to track which slot is in which stage. For a deeper look at how these setups work in practice, the automated hydroponic setup types page covers the full range of options.

| Week | Key Actions | Notes |
|---|---|---|
| Week 1 | Germinate seeds, EC 0.5–1.0, 18h light | Check moisture twice daily |
| Week 2 | Transplant to system, increase electrical conductivity moderately | First true leaves visible |
| Week 3–4 | Vegetative feeding, prune dead leaves, check airflow | EC 1.5–2.0 for leafy crops |
| Week 5 | Monitor for maturity cues, taste-test outer leaves | Lettuce may be ready |
| Week 6 | Harvest leafy crops; shift fruiting crops to P/K feed | Stagger-plant next slot |
| Week 7–8 | Continue fruiting management; harvest herbs continuously | Flush 48h before final cut |
| Week 9–12 | Fruiting crops peak; harvest tomatoes as they ripen | Sanitize slots as they empty |
Succession planting checklist:
Adapt this template by compressing weeks 3–5 for microgreens or extending weeks 7–12 for tomatoes. For indoor gardening in limited spaces, prioritize fast-cycling crops like microgreens and lettuce to keep harvests coming without long waits.
A hydroponic harvest cycle runs from germination through post-harvest reset, and managing each stage actively, rather than passively waiting, is what separates consistent yields from disappointing ones.
| Point | Details |
|---|---|
| Track stages, not just dates | Use visual cues and GDD alongside the calendar to time harvests accurately. |
| Stagger your planting | Starting new slots every 1–2 weeks gives you a continuous supply instead of one big harvest. |
| Match inputs to stage | Shift from nitrogen-heavy feeding to phosphorus/potassium when plants move to flowering. |
| Handle post-harvest properly | Cool, dry storage and sanitized components protect both your produce and your next cycle. |
| Use the planning template | The week-by-week table above adapts to any crop from microgreens (10–14 days) to tomatoes (longer cycle). |
Most beginner guides treat the harvest cycle as a countdown: plant on day one, harvest on day 35, repeat. That framing misses the point entirely. The cycle is not a timer. It is a biological process that responds to what you do at each stage, and in a hydroponic system, you control nearly every variable.
What that means in practice: a grower who tracks EC daily, adjusts light schedules when plants shift from vegetative to reproductive growth, and harvests based on plant cues rather than the calendar will consistently outperform one who follows a fixed schedule. The difference shows up in flavor first, then in shelf life, then in how much produce actually makes it to the table rather than the compost bin.
The other thing most guides understate is the post-harvest reset. Sanitizing your system between cycles is not optional maintenance. It is the foundation of the next cycle. A clean reservoir and sterile net pots mean your next batch of seedlings starts without competing against the residue of the last one.
Sprout-lab’s modular systems make this easier because each slot resets independently. You do not have to shut down the whole system to clean one section. That operational flexibility is what makes staggered planting genuinely practical rather than theoretically appealing. If you are ready to try a continuous harvest plan, growing in a studio apartment is a good place to start.
For anyone who wants to go deeper on specific topics covered here:
A harvest cycle is the full sequence from seed germination to harvest and system reset, including every nutrient, light, and pruning action in between. In hydroponics, it repeats each time you replant a slot.
It depends on the crop, with cycles ranging from very short for microgreens to longer periods for fruiting plants like tomatoes.
Physiological maturity is when a plant reaches maximum dry weight; harvest maturity is when it has the best flavor and storage life. For most home hydroponic crops, harvest maturity is the right target.
Stagger your planting by starting a new slot every 1–2 weeks. This staggers harvest windows so you get produce regularly rather than all at once.
Yes. Draining and sanitizing the reservoir, channels, and net pots with a dilute hydrogen peroxide solution between cycles prevents root rot and gives your next seedlings a clean start.