Free shipping for order over $50

Free shipping for order over $50
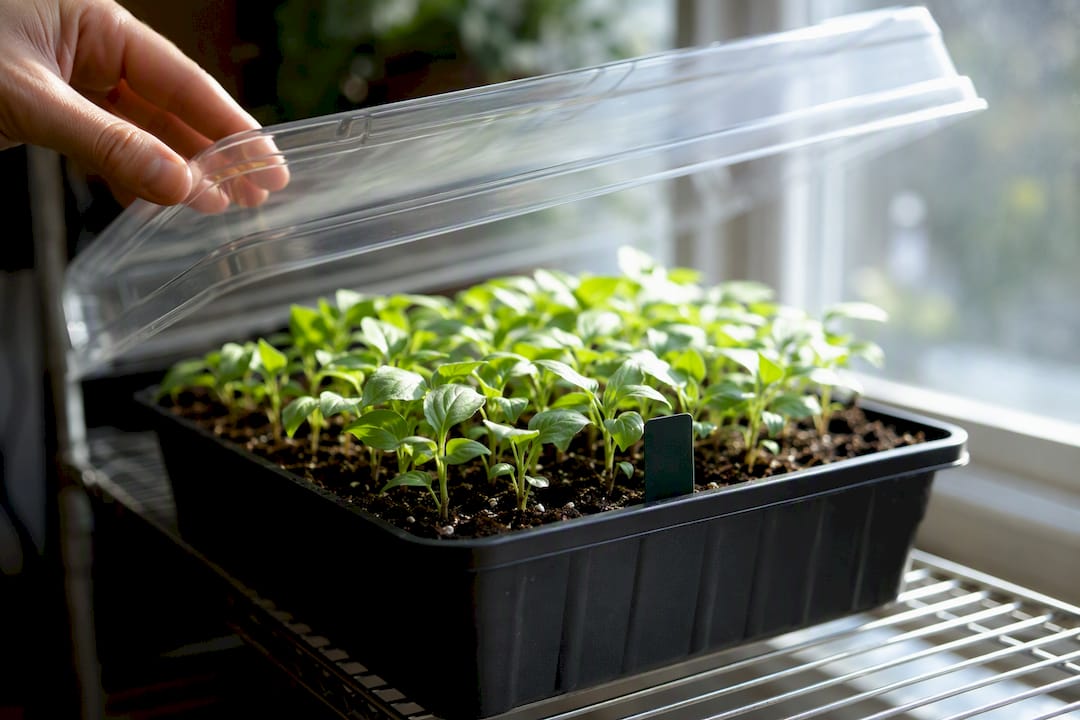
Use a humidity dome to protect tiny or surface-sown seeds during germination, then start venting the moment you see sprouts. Cover the tray, keep the mix moist, and check daily for condensation. Once true leaves appear, or you spot mold or persistent fogging, the dome comes off for good. Pre-moisten your growing medium before you snap the lid on.
TL;DR:
- Humidity domes are most effective for small, surface-sown seeds in dry or drafty environments, especially for fast and medium germinators like lettuce and tomatoes.
- Proper setup involves pre-moistening the soil, selecting a snug-fitting clear dome, and gradually venting over four days once seedlings appear to avoid shock and damping-off.
- Keep domes on until the first sprouts, then vent gradually over four days, adjusting for cooler or drafty rooms by extending the schedule.
- Persistent condensation, mold, leggy stems, or damping-off indicate the need to adjust humidity, light, or watering habits immediately.
- DIY covers made from clear plastic containers or plastic wrap work short-term, but purpose-built domes with proper vents are more durable for multiple seasons.
A dome earns its place on your tray when the seeds are small, surface-sown, or planted in a room that runs dry or drafty. Lettuce, basil, and most microgreens sit right on top of the soil rather than buried under it, so they dry out within hours without a moisture barrier. A dome traps a humid microclimate, often 80 to 95 percent relative humidity, which slows evaporation exactly where the seed needs consistent contact with water to sprout.
Not every seed needs one, though. Large, deep-sown seeds like beans, squash, and sunflowers are buried far enough down that surface drying barely touches them.
Timing varies by seed type, and knowing your window helps you decide when to start checking for sprouts:
Tiny surface seeds dry out fastest of any category, which is why matching dome use to seed size and depth, not habit, makes the biggest difference in germination rates. Watch condensation patterns, soil surface color, and the percentage of cells showing green, and you’ll know within a day or two whether the dome is doing its job.
Getting the setup right on day one prevents most of the problems people blame on the dome itself. Here’s the sequence that works:
Pro Tip: Keep a small notebook or phone note tracking sowing date and first-sprout date for each tray. After two or three seasons, you’ll have your own personal germination calendar that beats any seed packet estimate.
Most purpose-built domes include small vent knobs on top for exactly this reason. They let you dial down humidity gradually instead of ripping the whole cover off and shocking the tray with a sudden drop in moisture.
The short answer: from sowing until the first sprouts appear, then a gradual four-day taper. Here’s the actual schedule that keeps seedlings healthy without shocking them:
If seedlings droop at any step, slow down and back up a day. That’s normal, not failure.
A few conditions call for a slower pace than the standard four days:
Once the dome comes off, hardening off for outdoor transplants is a separate process. Don’t confuse dome removal with the sun and wind exposure that comes weeks later.
Four problems account for almost every dome-related failure, and each has a fast fix.
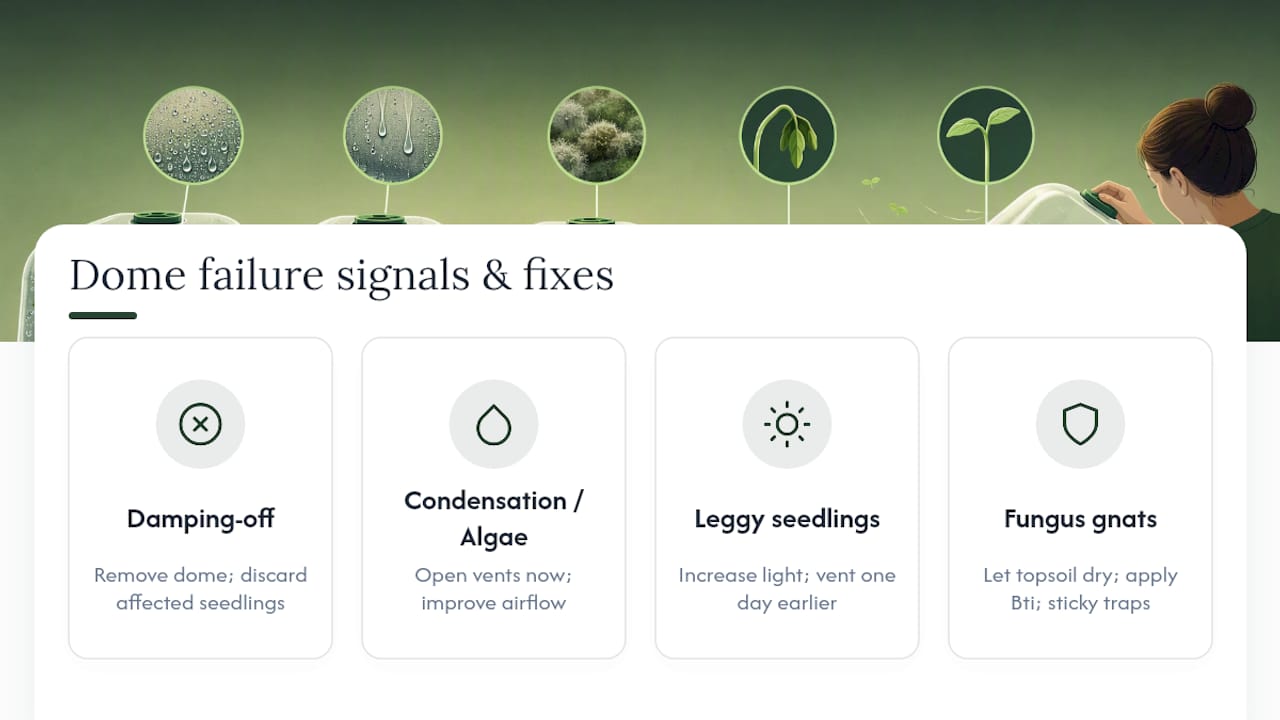
Damping-off shows up as a seedling that looks fine one day and collapses at the soil line the next, often with a dark, thread-thin stem. Remove the dome immediately, pull affected seedlings out of the tray, and cut back watering. Damping-off pathogens like Pythium and Rhizoctonia thrive in exactly the trapped moisture and still air a sealed dome creates.
Persistent condensation, heavy droplets that reappear within an hour of wiping the dome clean, means humidity isn’t exchanging with the room. Green algae or fuzzy growth on the soil surface is your signal to open vents now, not tomorrow.
Leggy, pale seedlings stretching toward the light usually mean insufficient brightness, not a dome problem at all. Move grow lights closer or increase intensity, and vent a day earlier than your usual schedule to firm up the stems.
Fungus gnats breed in the same damp surface conditions domes create. Let the top layer of soil dry between waterings, and treat with a biological control containing Bacillus thuringiensis israelensis, sold under names like Mosquito Bits, paired with yellow sticky traps to catch adults.
Pro Tip: If more than one seedling in a tray shows damping-off, isolate the whole tray rather than picking out individual casualties. The fungus is already in the soil, and neighboring cells are next.
You don’t need a purpose-built dome to get through germination. A clear plastic salad container lid, an old takeout container, or a plastic bottle with the bottom cut off and slipped over a small pot all work as improvised cloches. Loosely draped plastic wrap does the job too, propped up with a few toothpicks so it doesn’t smother the surface.
A few rules keep DIY covers safe and effective:
DIY covers work fine for a tray or two, but once you’re running multiple trays every season, a purpose-built dome with molded vents and a snug tray fit saves time and holds up far longer than a bottle you’re constantly re-cutting.
Sprout-lab builds its seed-starting guidance around one principle: germination success comes down to consistent moisture, not constant attention. Pre-wetting growing mix before sowing, then pairing a dome with a compact grow light or heat mat, keeps humidity and temperature stable without you hovering over the tray every hour.
Sanitation matters just as much as setup. Reusable trays and domes that get properly washed between cycles cut down on the mold and algae carryover that causes repeat problems season after season. A few things worth building into your routine:
Home growers who keep this loop tight report faster, more even sprouting across trays, which is the whole point of using a dome in the first place.
Most seed-starting advice treats the dome like the hard part. It isn’t. Snapping a clear lid over a tray of pre-moistened soil takes thirty seconds. The skill that actually separates a good germination rate from a moldy, leggy mess is timing the exit.
Beginners tend to do one of two things wrong: they leave the dome on for weeks because “more humidity seems safer,” or they yank it off the second they see any green and shock a tray of seedlings that needed another day. Neither instinct is really about the dome. Both come from not watching the tray closely enough during the window that matters most, which is the 48 hours after first sprouts show.
If you take one thing from this guide, make it this: check your trays daily, not because you need to fuss over them, but because the signals that tell you when to vent (condensation, sprout percentage, stem color) change fast and reverse just as fast if you miss the moment. A dome is a tool for a phase, not a permanent fixture. Treat it that way and most of the common failures disappear on their own.
— Luna
A dome and a tray get most seeds through germination, but consistency gets harder once you’re running several trays at once, especially in a small apartment where light and temperature swing throughout the day. Sprout-lab’s humidity dome and seeding tray set is built to hold snug, even moisture without the guesswork of propping a bottle cap or checking for gaps in plastic wrap.

Expect steady humidity control, trays and domes that clean up and reuse season after season, and a fit designed to reduce the surface mold and damping-off issues that come from ill-fitting DIY covers. Once your seedlings outgrow the tray, the same modular thinking carries into automated hydroponic setups built for compact spaces. If you’re ready to start your next batch with a setup made for the job, browse the current tray and dome options and get your seeds moving today.
Yes, for tiny or surface-sown seeds like lettuce, basil, and microgreens, especially in dry or drafty rooms. Large, deep-sown seeds usually germinate fine without one.
Keep it on from sowing until the first sprouts appear, then vent gradually over three to four days before removing it fully. True leaves, mold, or heavy condensation are all signs it’s time to take it off.
Clear salad container lids, cut-off plastic bottles, or loosely draped plastic wrap propped up with toothpicks all work as temporary domes. Use clear plastic only, and sanitize any reused container with hot soapy water followed by a diluted bleach or hydrogen peroxide rinse.
Plants should stay under a dome only through germination, generally a few days to three weeks depending on seed type. Leaving seedlings covered after true leaves appear raises the risk of damping-off and weak, leggy growth.